Canvas
Canvas基本概念介紹與範例實作
2018/10/07 08:06:15
0
2994
Canvas基本概念介紹與範例實作
| 簡介 |
簡單介紹Canvas基礎概念,與實作簡單範例與隨機驗證碼功能。 |
| 作者 |
張鈞名 |
<canvas> 元素
<canvas id="tutorial" width="150" height="150">
</canvas>
先看看canvas的標籤元素,它有點像<img>圖片標籤,但是它沒有src與alt屬性,但是它跟<img>一樣有height跟width屬性,但是此屬性並不是必須的。如果height跟width屬性不填,預設為寬300px、高150px。
需要</canvas>標籤
<img>不需要結尾</img>,但canvas需要結尾標籤</canvas >
渲染環境(rendering context)
<canvas>會產生繪圖畫布,而這個畫布可以有一個或多個rendering context,我們可以利用這個rendering context來產生所要的顯示內容,而rendering context為2D的渲染環境。
要開始繪圖之前,我們必須先取得rendering context,才能開始繪圖,canvars有提供一個方法為getcontext(),而此方法中的參數為渲染的類型,此文章為2D的渲染環境,所以參數為"2D"。
var canvas = document.getElementById('tutorial');
var ctx = canvas.getContext('2d');
一個簡單的範例
<
html>
<
head>
<
title>Canvas tutorial</
title>
<
script
type=
"text/javascript">
function
draw(){
var canvas
= document.
getElementById(
'tutorial');
if (canvas.getContext){
var ctx
= canvas.
getContext(
'2d');
}
}
</
script>
<
style
type=
"text/css">
canvas {
border:
1
px
solid
black; }
</
style>
</
head>
<
body
onload=
"
draw
();">
<
canvas
id=
"tutorial"
width=
"150"
height=
"150"></
canvas>
</
body>
</
html>
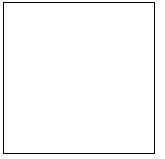
一旦網頁載入完成後,程式碼會呼叫draw()的方法進行canvas渲染,如下圖為渲染樣式:

第二個簡單範例
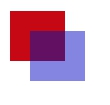
接下來畫兩個相交的正方形,其中一個正方形有alpha透明值
<
html>
<
head>
<
script
type=
"application/javascript">
function
draw() {
var canvas
= document.
getElementById(
"canvas");
if (canvas.getContext) {
var ctx
= canvas.
getContext(
"2d");
//設定rgb顏色
ctx.fillStyle
=
"rgb(200,0,0)";
//利用fillRect方法畫出矩形大小與位置
ctx.
fillRect (
10,
10,
55,
50);
//設定rgb顏色與alpha透明值
ctx.fillStyle
=
"rgba(0, 0, 200, 0.5)";
//利用fillRect方法畫出矩形大小與位置
ctx.
fillRect (
30,
30,
55,
50);
}
}
</
script>
</
head>
<
body
onload=
"
draw
();">
<
canvas
id=
"canvas"
width=
"150"
height=
"150"></
canvas>
</
body>
</
html>

利用Canvas實作隨機驗證碼功能
在網站上輸入表單時,為了防止機器人輸入,會要使用者輸入驗證碼數字文字,這個驗證碼我們可以使用Canvas畫出來,點擊驗證碼又可以重整代碼,實際演示如下圖:

Canvas增加onclick點擊事件呼叫draw方法,程式碼說明如下:
<
html>
<
head>
<
script
type=
"application/javascript">
function
draw() {
var canvas
= document.
getElementById(
"canvas");
if (canvas.getContext) {
var ctx
= canvas.
getContext(
"2d");
//清除畫布
ctx.
clearRect(
0,
0, canvas.width, canvas.height);
//產生50條雜湊線條
for (
var j
=
0; j
<
50; j
++) {
ctx.strokeStyle
=
rgb().
toString();
//開啟畫線
ctx.
beginPath();
//畫線隨機起點座標
ctx.
moveTo(
lineX(),
lineY());
//畫線到隨機座標
ctx.
lineTo(
lineX(),
lineY());
//結束畫線
ctx.
closePath();
//
stroke() 方法會實際地繪製出通過 moveTo() 和 lineTo() 方法定義的路徑。
ctx.
stroke();
}
//設置隨機代碼樣式
ctx.fillStyle
=
'#6271a9';
//設置代碼字型大小
ctx.font
=
'bold 60px Arial';
//畫上隨機代碼文字
ctx.
fillText(
this.
createCode(),
30,
60);
}
}
function
createCode() {
this.code
=
'';
//驗證碼長度
var codeLength
=
4;
var random
= [
0,
1,
2,
3,
4,
5,
6,
7,
8,
9,
'a',
'b',
'c',
'd',
'e',
'f',
'g',
'h',
'i',
'j',
'k',
'l',
'm',
'n',
'o',
'p',
'q',
'r',
's',
't',
'u',
'v',
'w',
'x',
'y',
'z',
'A',
'B',
'C',
'D',
'E',
'F',
'G',
'H',
'I',
'J',
'K',
'L',
'M',
'N',
'O',
'P',
'Q',
'R',
'S',
'T',
'U',
'V',
'W',
'X',
'Y',
'Z'];
//取得
隨機
0~51索引值
for (
let i
=
0; i
< codeLength; i
++) {
const index
=
Math.
floor(
Math.
random()
*
52);
//取得隨機代碼
this.code
+= random[index];
}
return
this.code;
}
//取得
隨機
200寬度範圍內X座標
function
lineX() {
var ranLineX
=
Math.
floor(
Math.
random()
*
200);
return ranLineX;
}
//取得
隨機
80高度內Y座標
function
lineY() {
var ranLineY
=
Math.
floor(
Math.
random()
*
80);
return ranLineY;
}
//取得
隨機
色碼
function
rgb() {
return
'#'
+
Math.
floor(
Math.
random()
*
16777215).
toString(
16);
}
</
script>
</
head>
<
body
onload=
"
draw
();">
<
canvas
id=
"canvas"
onclick=
"
draw
()"
width=
"200"
height=
"80"></
canvas>
</
body>
</
html>


