Swagger2Markup API靜態文件說明書
前言
在已建立Swagger說明文件的專案裡,我們可以使用Swagger2markup的方式轉換成靜態文件檔,不用通過swagger-ui或是/v2/api-docs 才能看到說明文件,並且可以針對轉換後的文件檔做加工加入一些圖片或是補充說明,在使用上更增加了可讀性與方便性.
使用工具
使用plug-in直接在專案上產出(Gradle 及Maven 皆可)
Gradle plugin-asciidoctor
Gradle plugin-swagger2markup
使用CLI修改已產出的swagger文件(json or yaml 皆可)
swagger2markup-cli
Asciidoctor
編輯Adoc 工具
VSCode - AsciiDoc
Swagger to Markup
1. 利用Gradle plugin -加入配置
1. Build.gradle 加入gradle plugin
plugins {
	id 'org.springframework.boot' version '2.2.1.RELEASE'
	id 'io.spring.dependency-management' version '1.0.8.RELEASE'
	id 'java'
	id 'org.asciidoctor.convert' version '2.3.0'
	id "io.github.lhotari.swagger2markup" version "1.3.3.1"
}

group = 'com.example'
version = '0.0.1-SNAPSHOT'
sourceCompatibility = '1.8'
targetCompatibility = '1.8'
tasks.withType(JavaCompile) {
	options.deprecation = true
	options.encoding = 'UTF-8'
	options.compilerArgs << "-Xlint:unchecked"
}

repositories {
	jcenter()
	mavenCentral()
	maven { url 'https://repo.spring.io/snapshot' }
	maven { url 'http://oss.jfrog.org/artifactory/oss-snapshot-local/' }
	mavenLocal()
}


dependencies {
	implementation('org.springframework.boot:spring-boot-starter-aop')
	implementation('org.springframework.boot:spring-boot-starter-cache')
	implementation('org.springframework.boot:spring-boot-starter-data-jpa')
	implementation('org.springframework.boot:spring-boot-starter-web')
	implementation('org.springframework.boot:spring-boot-starter-security')
	implementation('io.springfox:springfox-swagger2:2.9.2' )
	implementation('io.springfox:springfox-swagger-ui:2.9.2')
	implementation('org.projectlombok:lombok:1.18.4')
    implementation('com.github.ben-manes.caffeine:caffeine')
	implementation('org.apache.commons:commons-lang3')
	implementation('io.jsonwebtoken:jjwt:0.7.0')

	runtimeOnly('com.h2database:h2')

	testImplementation('org.springframework.boot:spring-boot-starter-test')
	testImplementation( 'org.springframework.boot:spring-boot-starter-test')
	testImplementation( 'junit:junit')
	testImplementation( 'org.springframework.restdocs:spring-restdocs-mockmvc')
	testImplementation( 'com.fasterxml.jackson.module:jackson-module-jsonSchema:2.6.5')
}
2. 利用Gradle plugin - 轉換adoc
1. 增加輸出指令:將swagger 2 的json或是yml 檔案轉換成markup 格式的adoc
convertSwagger2markup {
	dependsOn test
	swaggerInput "${swaggerOutputDir}/swagger.json"
	outputDir asciiDocOutputDir
	config = [
			'swagger2markup.pathsGroupedBy' : 'TAGS',
			'swagger2markup.extensions.springRestDocs.snippetBaseUri': snippetsOutputDir.getAbsolutePath()]
}
2. 輸入檔位置設定在:swaggerInput 設定使用專案產出的或是其他符合格式swagger2 位置
3. 輸出檔位置設定在:outputDir 設定產出檔案的位置
4. 使用時 輸入:gradle convertSwagger2markup 即可(如需單獨執行可把dependsOn註解掉)
gradle convertSwagger2markup3. 利用Gradle plugin - 轉換html or pdf
1. 增加輸出指令:將aodc檔案轉換成html5或是pdf
asciidoctor {
	dependsOn convertSwagger2markup
	sourceDir = file('./swagger/source/')
	resources {
		from(sourceDir) {
			include 'images/**'
		}
	}
	sources {
		include 'index.adoc'
	}
	backends = ['html5']
	attributes = [
			doctype: 'book',
			toc: 'left',
			toclevels: '3',
			numbered: '',
			sectlinks: '',
			sectanchors: '',
			hardbreaks: '',
			generated: asciiDocOutputDir
	]
}
2. soruceDir:adoc檔案位置資料夾
3. resources: 其他需要一起輸出的靜態檔案
4. sources:輸出的檔案
5. attributes:將adoc 轉換成html 的相關設定可參照https://asciidoctor.org/docs/
6. 使用時 輸入:gradle asciidoctor 即可(如需單獨執行可把dependsOn註解掉)
gradle asciidoctor
4. Demo
1. 將一個已有使用swagger2 的專案 自動產出markup html5 說明檔
2. 加入測試程式 利用在 test 模式時會自動產出swagger2 json 檔
@RunWith(SpringRunner.class)
@AutoConfigureRestDocs(outputDir = "build/asciidoc/snippets")
@SpringBootTest(classes = {DemoApplication.class, SwagConfig.class, SecurityConfig.class})
@AutoConfigureMockMvc
public class DemoApplicationTests {

	@Autowired
	private MockMvc mockMvc;

	@Test
	public void createSpringfoxSwaggerJson() throws Exception {
		//String designFirstSwaggerLocation =
		// Swagger2MarkupTest.class.getResource("/swagger.yaml").getPath();
		String outputDir = System.getProperty("io.springfox.staticdocs.outputDir");
		MvcResult mvcResult = this.mockMvc
				.perform(get("/v2/api-docs")
				.accept(MediaType.APPLICATION_JSON))
				.andExpect(status().isOk())
				.andReturn();

		MockHttpServletResponse response = mvcResult.getResponse();
        response.setCharacterEncoding("utf-8");
        String swaggerJson = response.getContentAsString();
		Files.createDirectories(Paths.get(outputDir));
		try (BufferedWriter writer = Files.newBufferedWriter(Paths.get(outputDir,
                "swagger.json"), StandardCharsets.UTF_8)){
			writer.write(swaggerJson);
		}
	}
}
3. 加入gradle 設定
jar {
	dependsOn asciidoctor
	from ("${asciidoctor.outputDir}/html5") {
		into 'static/docs'
	}
}
4. 使用時 輸入 gradle build 將會同時產出swagger html 檔
gradle build 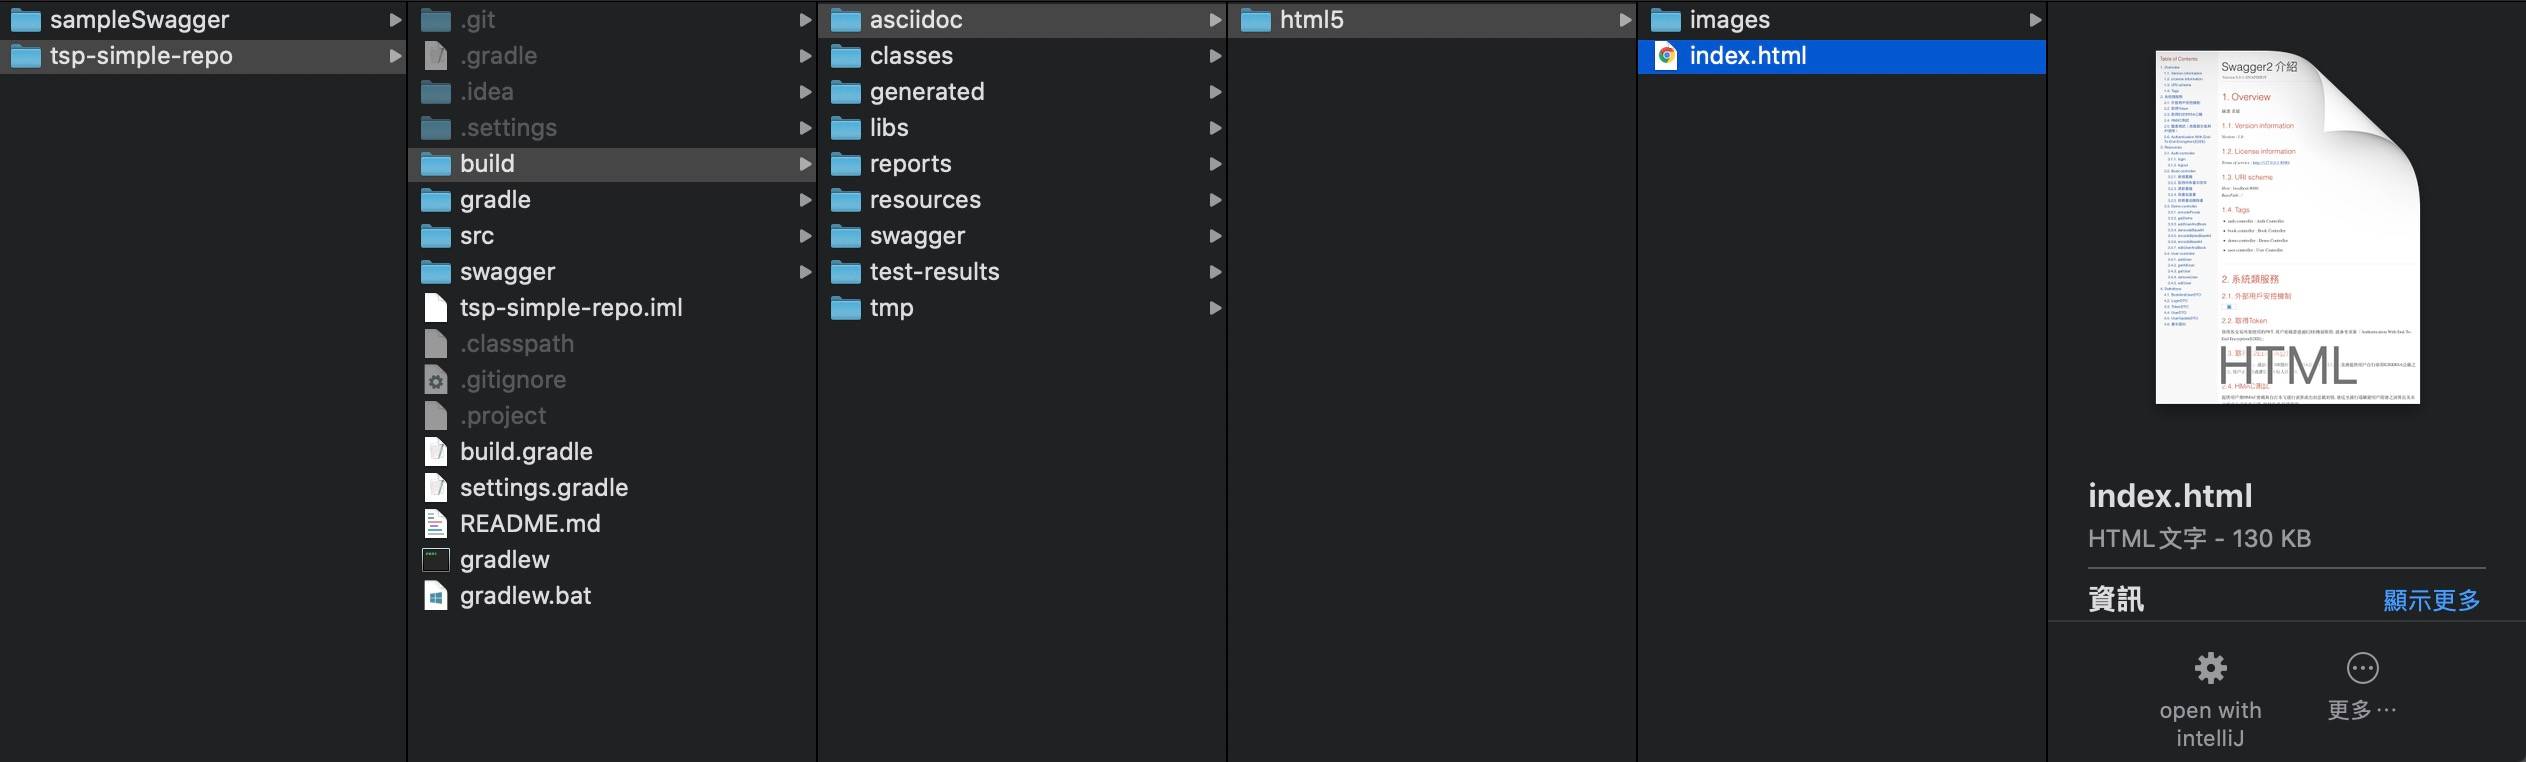
5. 利用CLI -轉換adoc(利用既有的swagger.json)
1. 安裝swagger2markup-cli 安裝方法可參照:https://github.com/Swagger2Markup/swagger2markup-cli
2. 另存成swagger.json
2. 使用方法輸入: swagger2markup convert -i {the_swagger_file}.json -d {/the/path/to/output}
3. 產出adoc 檔案
swagger2markup convert -i {the_swagger_file}.json -d {/the/path/to/output}6. 利用CLI-轉換html5
1. 安裝asciidoctor 安裝方法可參照: https://asciidoctor.org/
2. 產參考下面編輯adoc說明產出一個index.adoc
3. 使用方法輸入: asciidoctor {index}.adoc -a toc=left -d book -o {index}.html
4. 產出html 檔案
asciidoctor {index}.adoc -a toc=left -d book -o {index}.html7. 利用VSCode-AsciiDoc編輯adoc
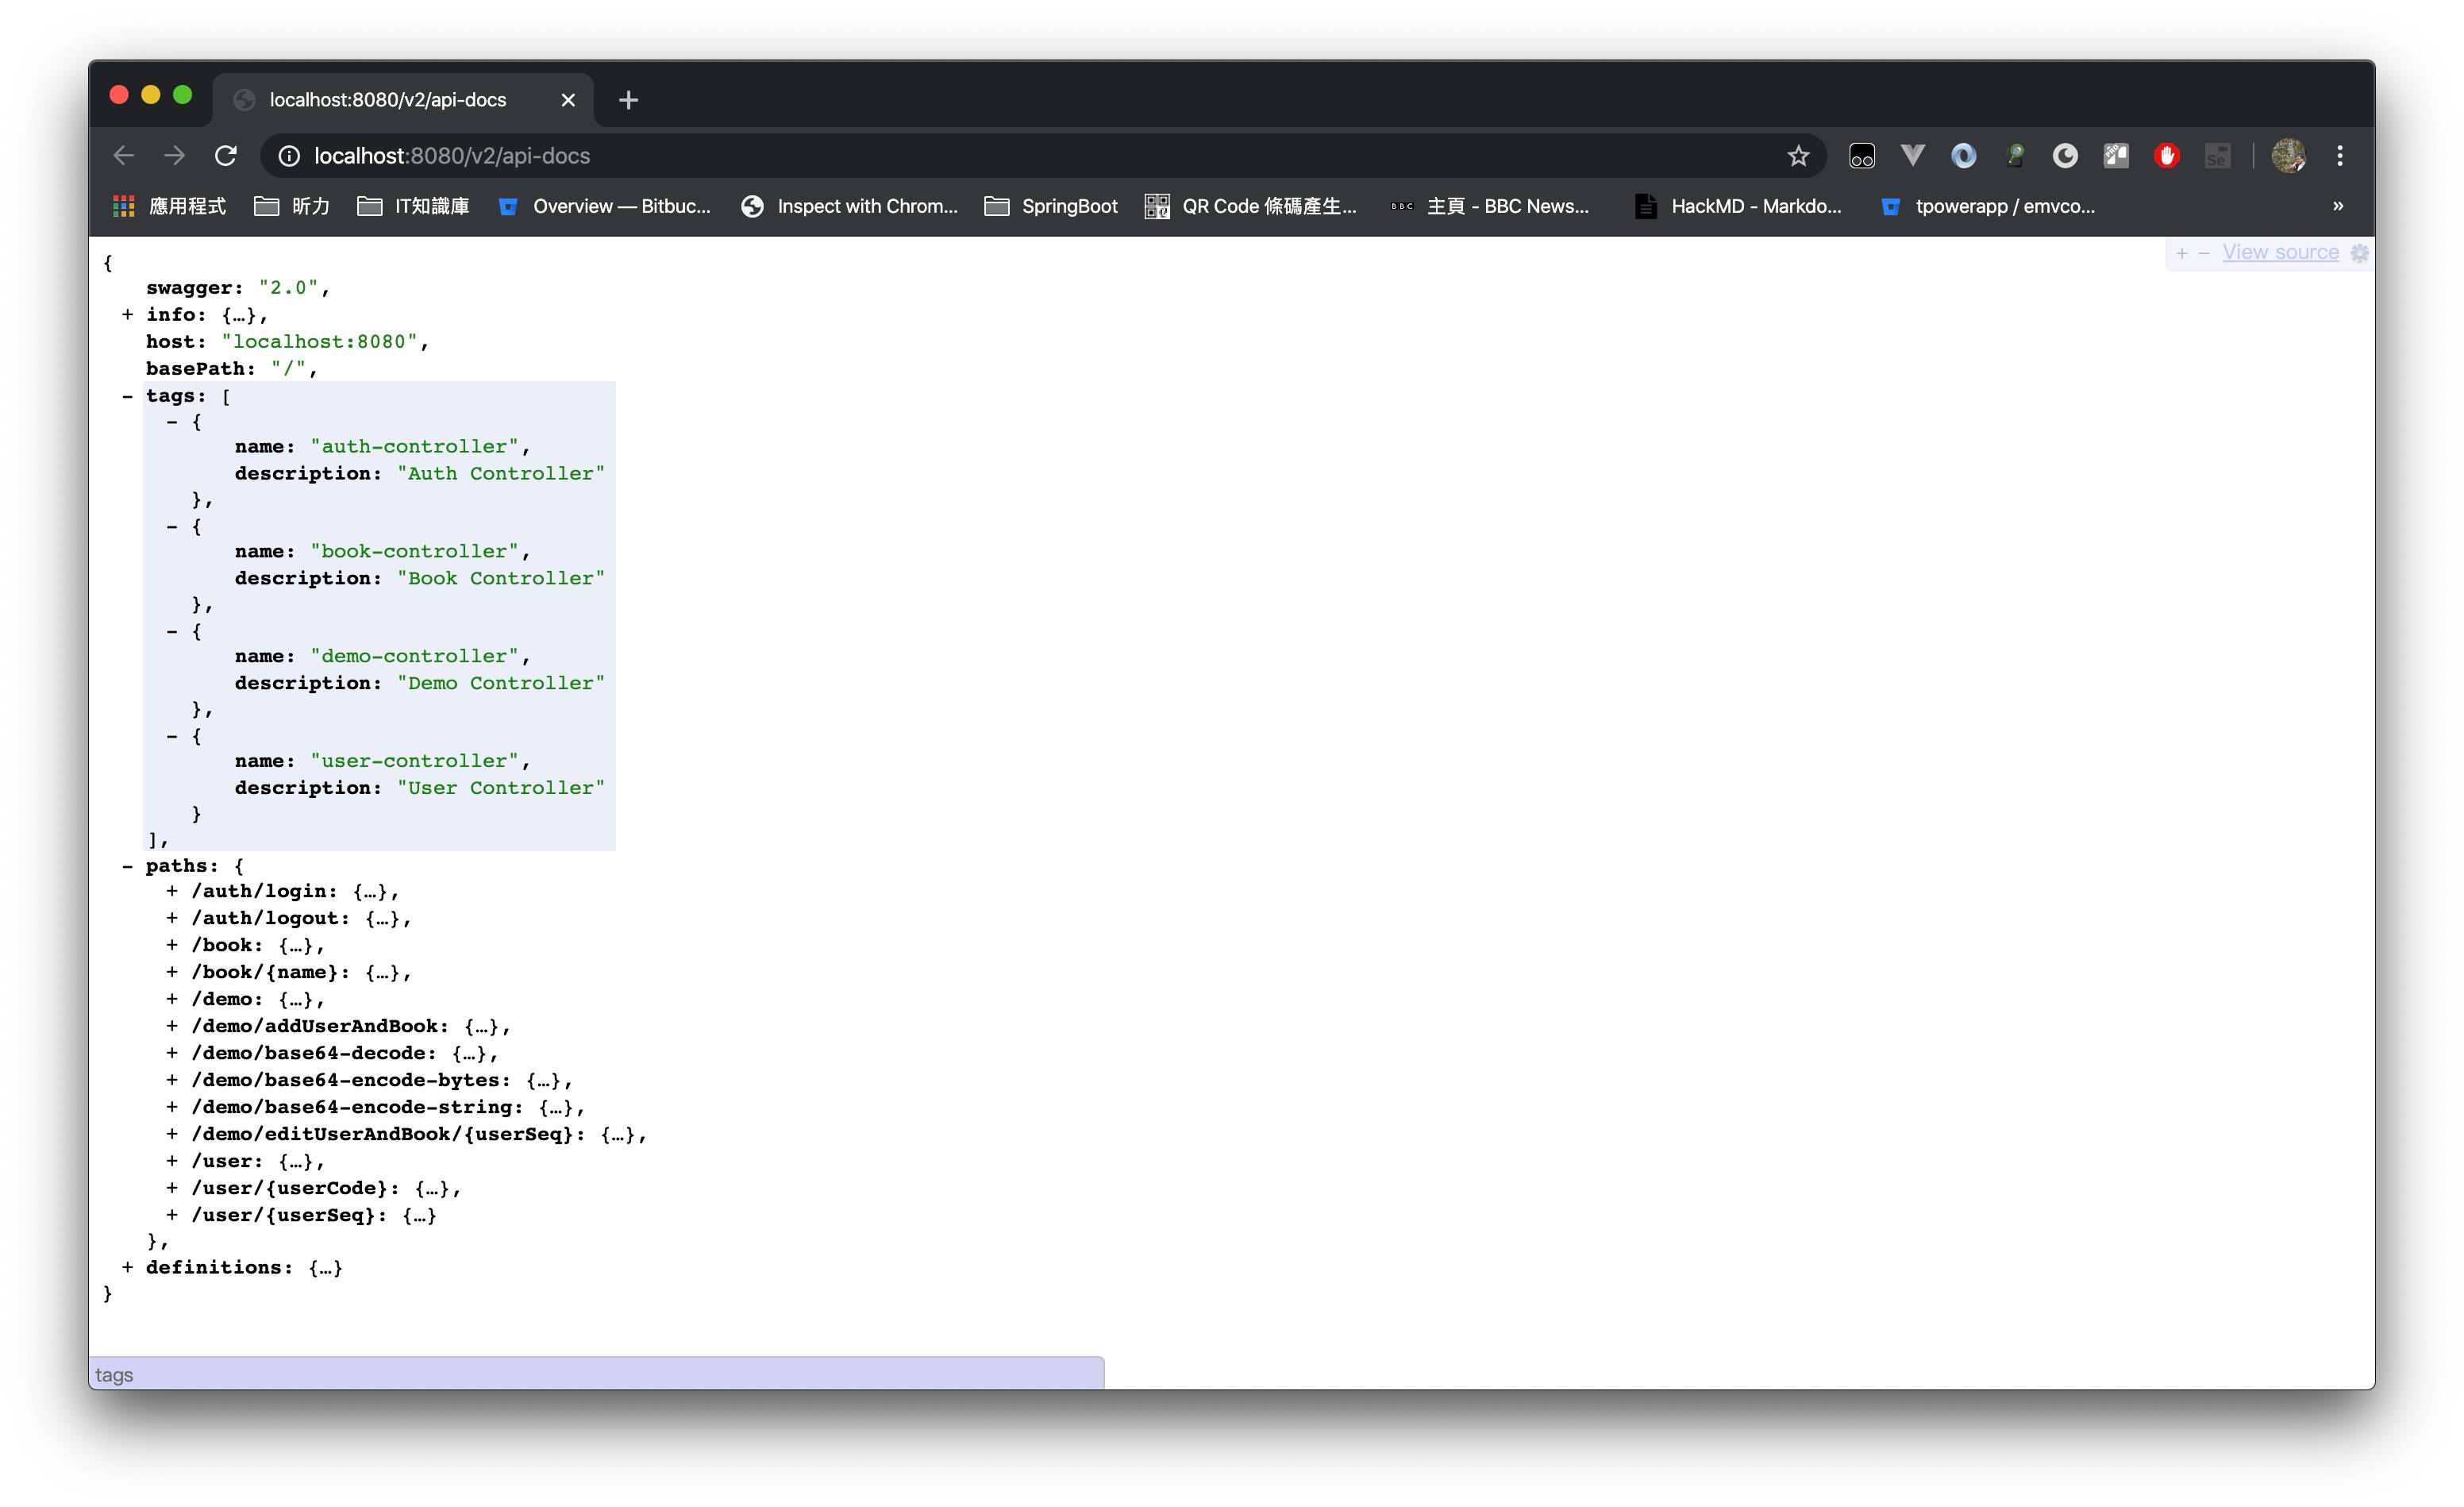
1. 安裝AsciiDoc -安裝方法:直接使用Marketplace 搜尋AsciiDoc 安裝

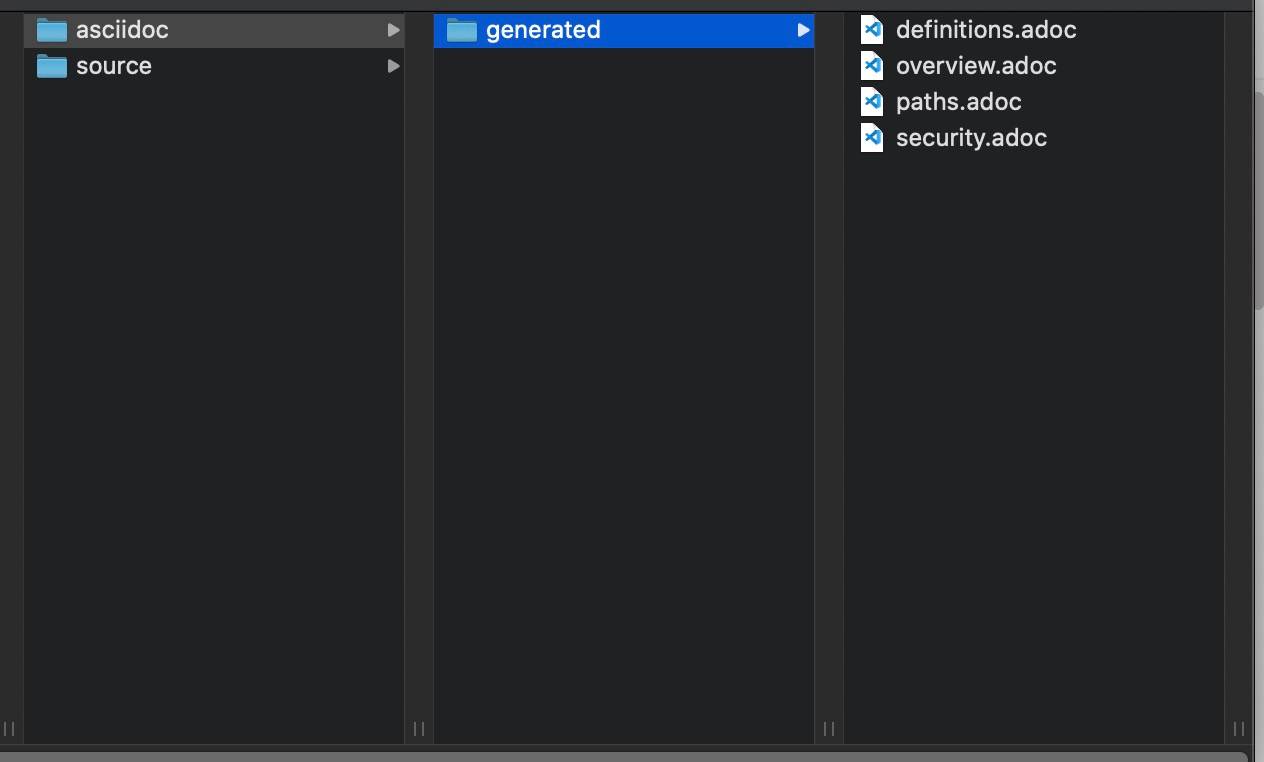
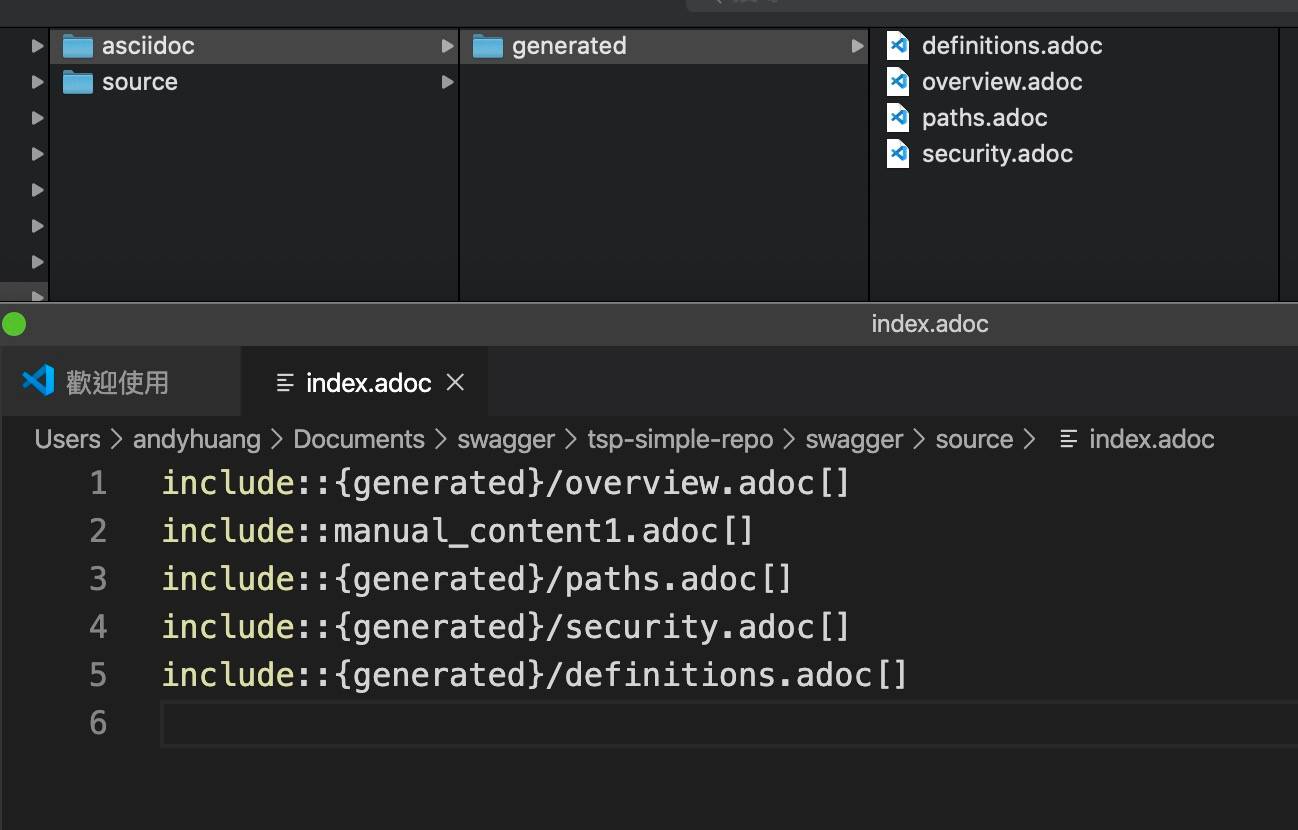
2. 一般從swagger轉出的adoc檔會有4個檔案
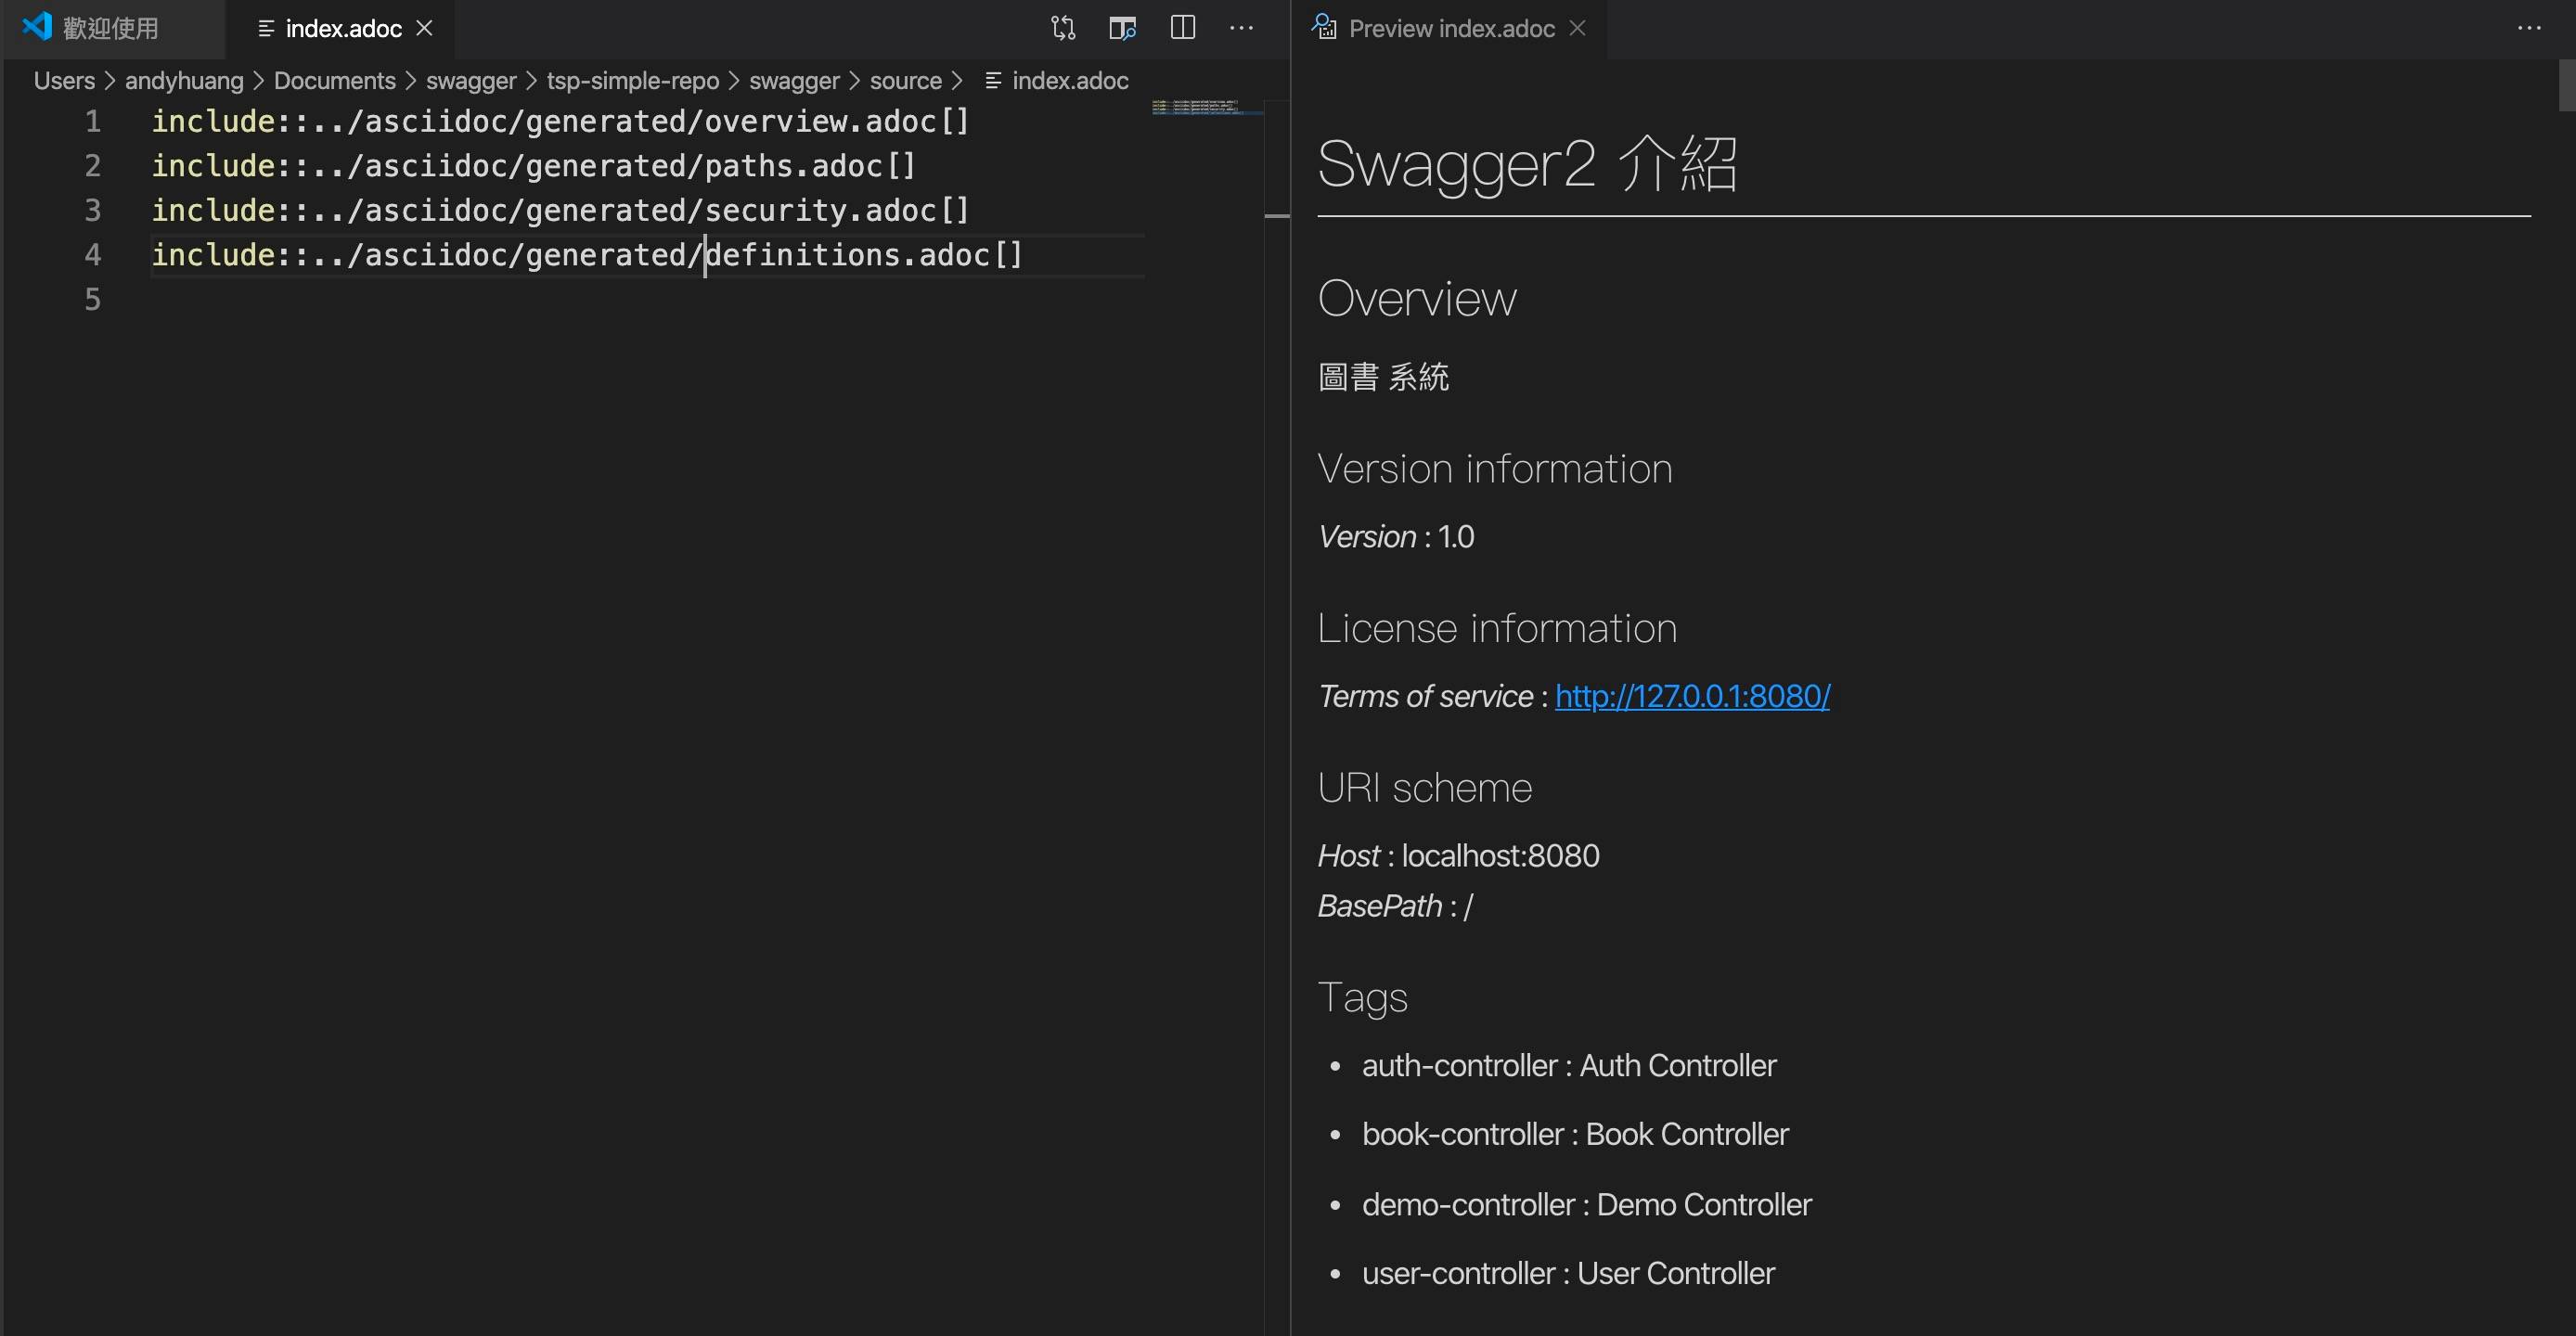
3. 建立index.adoc 並將四個檔案注入
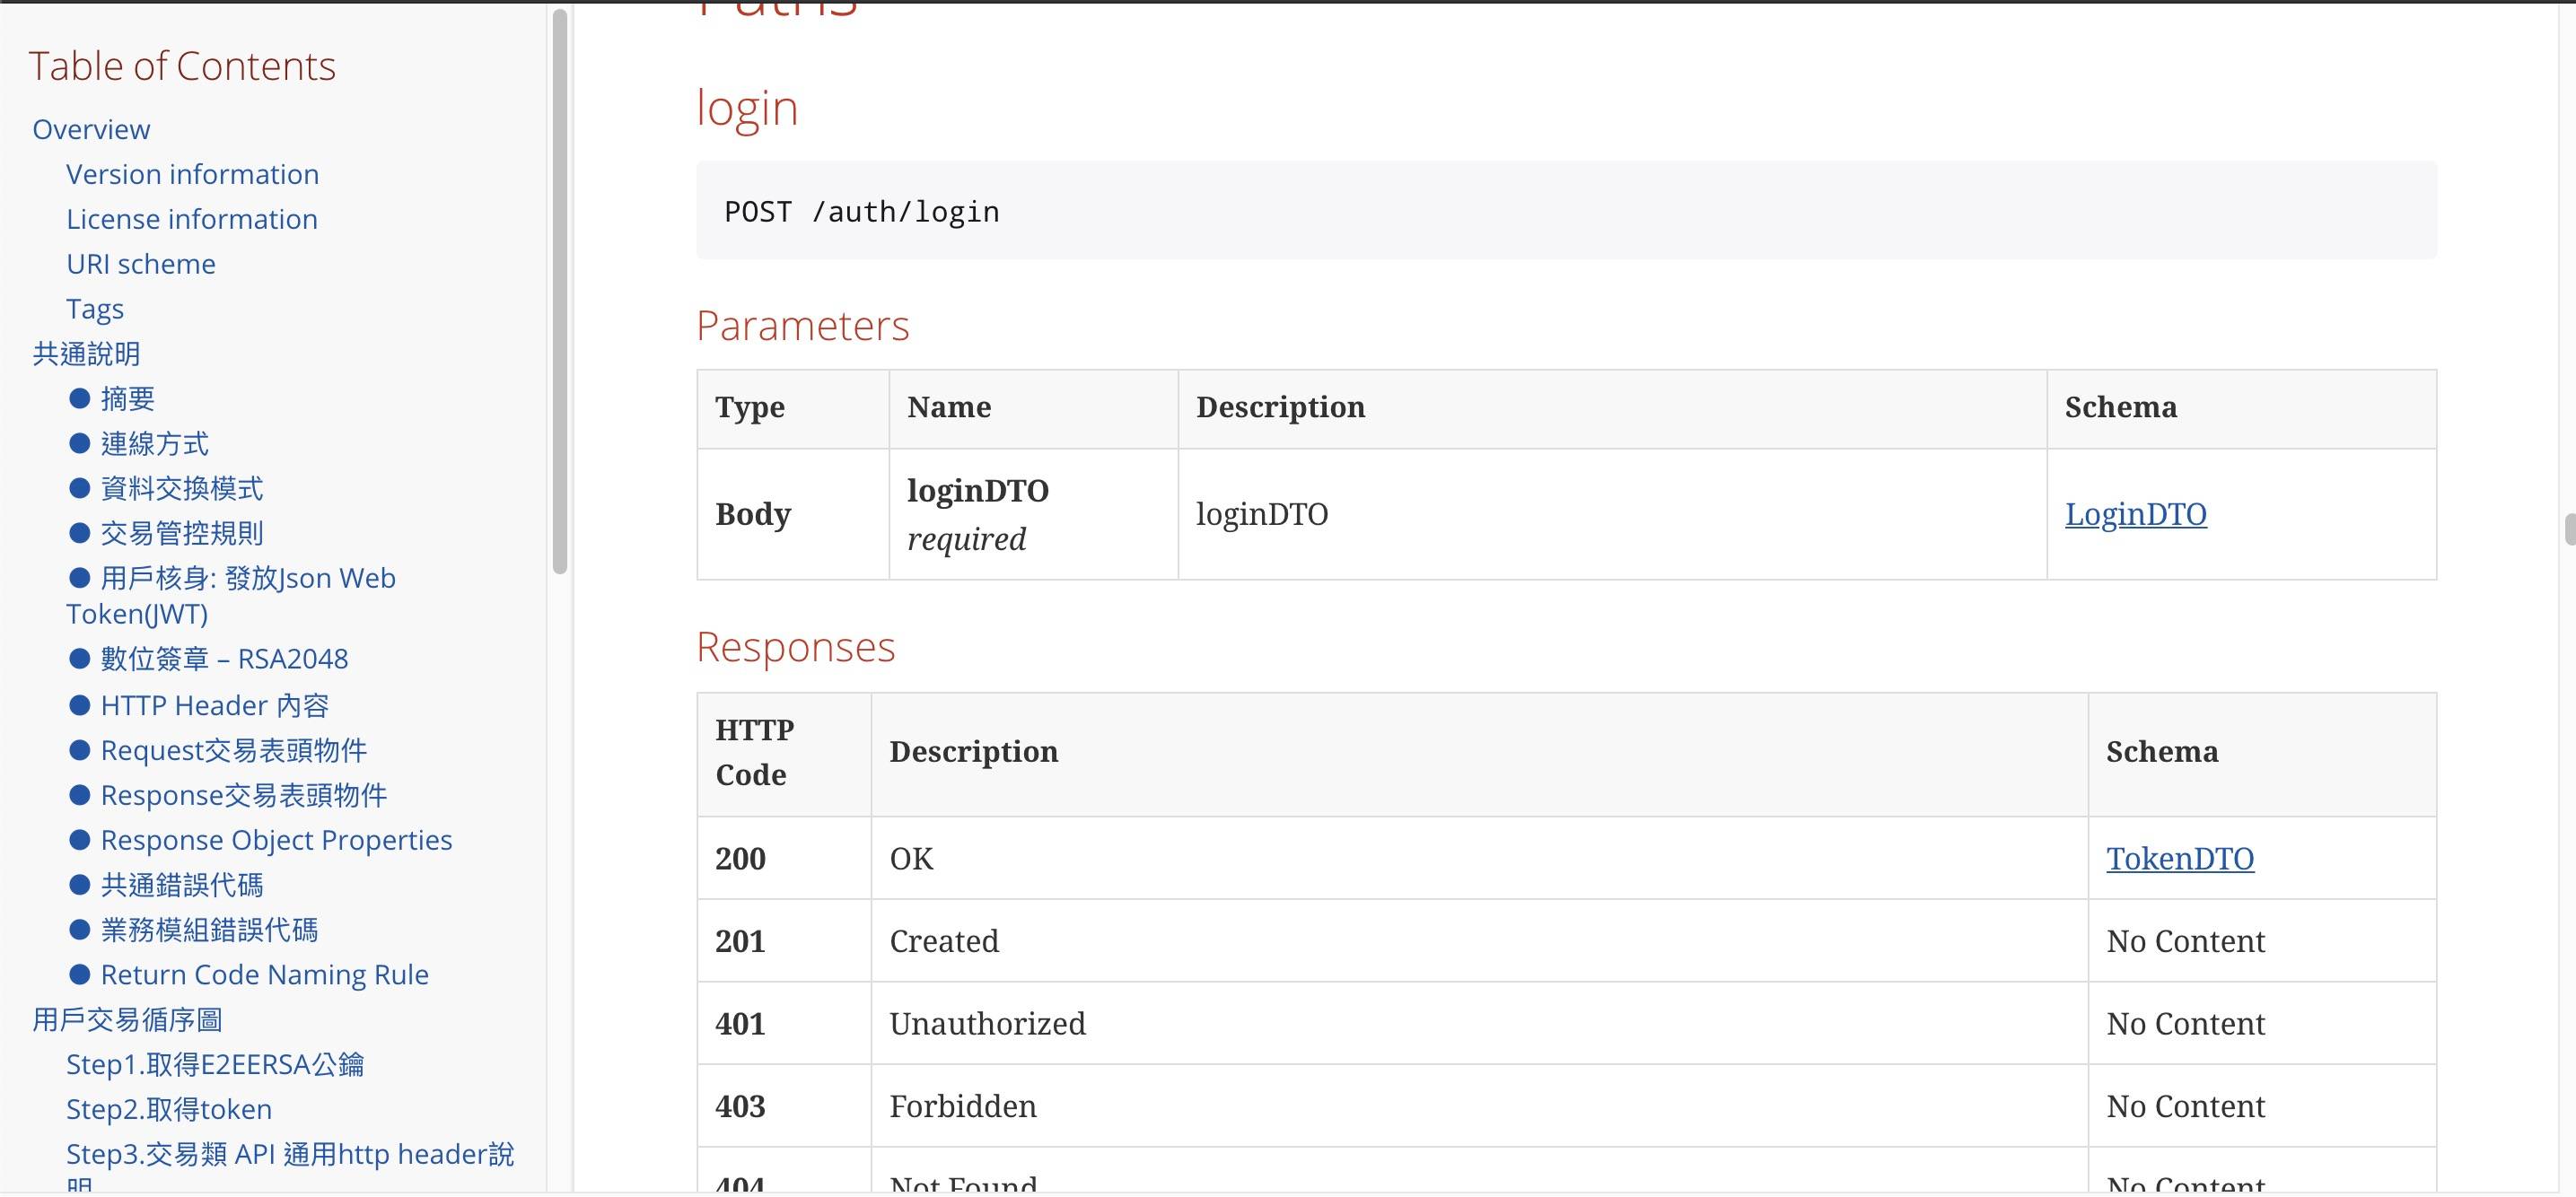
4. 預覽畫面並加工修改編輯(增加說明 加入圖片...等)
使用語法可參考 https://asciidoctor.org/docs/asciidoc-syntax-quick-reference/
8. 參考資料
1. https://github.com/Swagger2Markup/swagger2markup
2. https://github.com/Swagger2Markup/swagger2markup-cli
3. https://github.com/Swagger2Markup/spring-swagger2markup-demo