Implement JWT Authentication within .Net Core Web API
In order to protect our data access by valid users from web api endpoint, there're many ways to do for api protection. For that, JWT authentication is one of the popular methods.
What Is JWT ?
JWT, JSON Web Tokens are an open, industry standard RFC 7519 method for representing claims securely between two parties.
More details can be found from here.
A JWT token contains three parts of it, a Header, a Payload, and a Signature, and they are separated by period ( . dot).

- Header
{
 "alg" : "HS256",
 "typ" : "JWT"
}
Header holds the algorithms such as HMACSHA256, RSA or some many others, more supported algorithms could found here, and the type of token, typecally, it will be "JWT".
- Payload
{
 "loggedInAs": "admin",
 "iat": 1422779638
}
Payload contains claims, additional user data. Please note, DO NOT put sensitive information here for security reasons.
- Signature
HMAC-SHA256(base64urlEncoding(header) + '.' + base64urlEncoding(payload) + '.' + secret)
Signature is calculated by encoding the header and payload using Base64url Encoding and concatenating the two together with a period separator. That string is then run through the cryptographic algorithm specified in the header, in this case HMAC-SHA256. The Base64url Encoding is similar to base64, but uses different non-alphanumeric characters and omits padding.
The three parts are encoded separately by using Base64url Encoding, and concatenated using periods to produce the JWT:
const token = base64urlEncoding(header) + '.' + base64urlEncoding(payload) + '.' + base64urlEncoding(signature)
A valid token will look like something shown below,
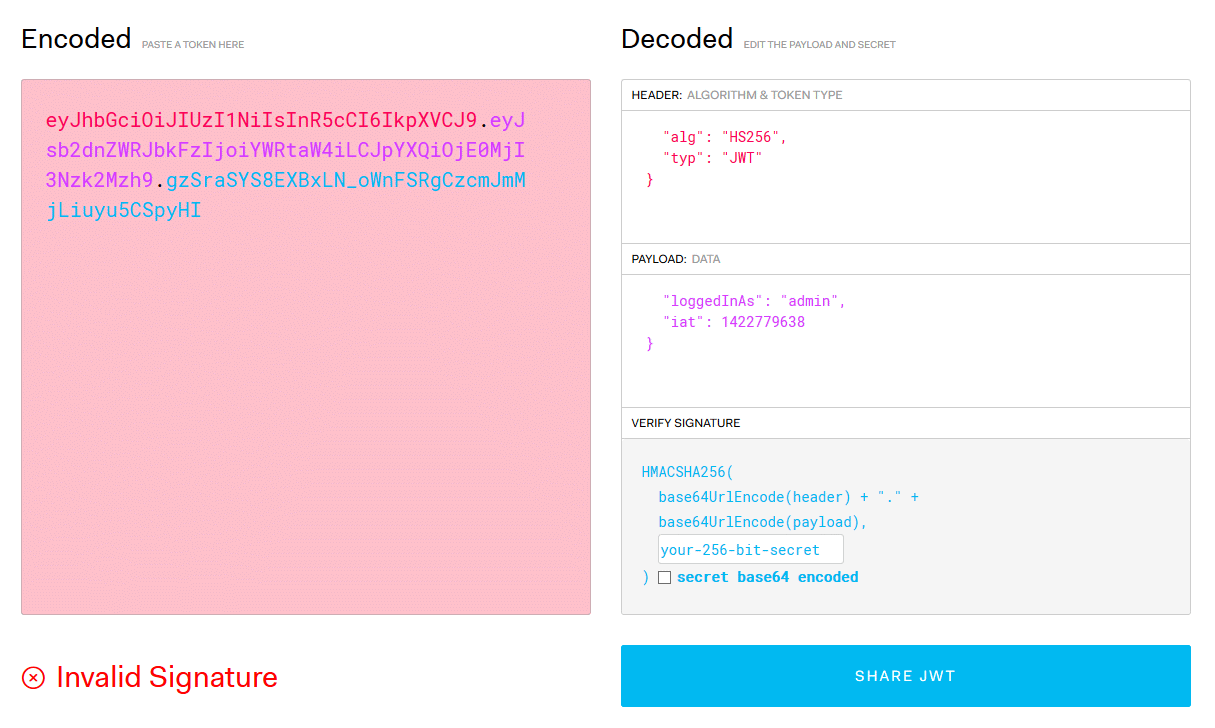
eyJhbGciOiJIUzI1NiIsInR5cCI6IkpXVCJ9.eyJsb2dnZWRJbkFzIjoiYWRtaW4iLCJpYXQiOjE0MjI3Nzk2Mzh9.gzSraSYS8EXBxLN_oWnFSRgCzcmJmMjLiuyu5CSpyHI
JWT debugger can help us to observe JWT token easily.
Setting up JWT Bearer
Now, let's move to Visual Studio, we will create a web api project via .net core 3.1.
First, we add some configuration in Startup.cs
    public void ConfigureServices(IServiceCollection services)
    {
        ......

        services
            .AddAuthentication(JwtBearerDefaults.AuthenticationScheme)
            .AddJwtBearer(options => {
                options.TokenValidationParameters = new TokenValidationParameters
                {
                    ValidateIssuer = true,
                    ValidIssuer = Configuration["AppSettings:Jwt:ValidIssuer"],
                    ValidateAudience = true,
                    ValidAudience = Configuration["AppSettings:Jwt:ValidAudience"],
                    ValidateIssuerSigningKey = true,
                    IssuerSigningKey = new SymmetricSecurityKey(System.Text.Encoding.UTF8.GetBytes(Configuration["AppSettings:Jwt:SignatureKey"])),
                    ValidateLifetime = true
                };
            });
    }
-
setting up authentication services for JWT bearer
-
the configuration key path should base on your appsettings.config structure
{ "AppSettings": { "Jwt": { "ValidIssuer": "......", "ValidAudience": "......", "SignatureKey": "......" } }, ...... } -
if need issuer, please remember to enable ValidateIssuer, and set a ValidIssuer
-
if need audience, please remember to enable ValidateAudience, and set a ValidAudience
-
issuer signing key, in many security reasons, and many use cases, we should NOT ignore this part
-
setting up token life time
Then, we add authentication middleware for verifying every http request.
app.UseAuthentication();
Generate Token
Next, let's generate a JWT token, while user login.
    [HttpGet("login/{userName}")]
    public IActionResult Login(string userName)
    {
        if (string.IsNullOrEmpty(userName))
            return BadRequest();

        // step 1. do something for querying user data

        // step 2. build calims
        var defineExpireTime = DateTime.Now.AddDays(3);
        var claims = new ClaimsIdentity(new[] {
            new Claim(JwtRegisteredClaimNames.NameId, dxid),
            new Claim(JwtRegisteredClaimNames.Jti, Guid.NewGuid().ToString()),
            new Claim(JwtRegisteredClaimNames.Nbf, DateTime.Now.ToString("yyyy-MM-dd HH:mm:ss.ffff")),
            new Claim(JwtRegisteredClaimNames.Exp, defineExpireTime.ToString("yyyy-MM-dd HH:mm:ss.ffff")),
            new Claim("Anything", "Custom claim, additional data needed..."),
            new Claim("Anything2", "more detail..."),
            ......
        });

        // step 3. calculate JWT signature, if enabled ValidateIssuerSigningKey in Startup.cs
        var securityKey = new SymmetricSecurityKey(System.Text.Encoding.UTF8.GetBytes(this._appSettings?.Jwt?.SignatureKey));

        // step 4-1, generate token by using JwtSecurityTokenHandler
        var tokenHandler = new JwtSecurityTokenHandler();

        // the SecurityTokenDescriptor is based on Configuration in Startup.cs
        var token = tokenHandler.CreateToken(new SecurityTokenDescriptor
        {
            Issuer = this._appSettings?.Jwt?.ValidIssuer,
            Audience = this._appSettings?.Jwt?.ValidAudience,
            Subject = claims,
            Expires = defineExpireTime,
            SigningCredentials = new SigningCredentials(securityKey, SecurityAlgorithms.HmacSha256)
        });

        // step 4-2, serializes a JwtSecurityToken into a JWT in compact serialization format
        var tokenString = tokenHandler.WriteToken(token);

        // final step, add generated token into Http response headers
        HttpContext.Response.Headers.Add("Token", $"{tokenString}");

        return Ok();

        // or just return tokenString directly
        // return Ok(new { tokenString });
    }
- Registered Claim Names
According to RFC 7519, and .net core documents, there're many "Registered Claim Names" in the IANA "JSON Web Token Claims" registry.
Here are some general used claims.
- "iss" (Issuer) Claim
- "aud" (Audience) Claim
- "exp" (Expiration Time) Claim
- "nbf" (Not Before) Claim
- "jti" (JWT ID) Claim
- "nameId" (NameId) Claim
Authorize
After we generated JWT token, and how to use it while an api (route) is being called ? Just add attribute on targeting actions.
    // people can access api without any authorization
    [AllowAnonymous]
    [HttpGet, Route("any")]
    public IActionResult GetDataByAnonymous()
    {
        // do something

        return Ok(new {
            data = "get by anonymous"
        });
    }

    // people who want to access this api MUST pass throuth JWT bearer authorization
    [Authorize(AuthenticationSchemes = JwtBearerDefaults.AuthenticationScheme)]
    [HttpGet, Route("jwt")]
    public IActionResult GetDataByJwt()
    {
        // do something

        return Ok(new {
            data = "get by jwt"
        });
    }
Or, we also can add
[Authorize(AuthenticationSchemes = JwtBearerDefaults.AuthenticationScheme)]
attribute on a targeting api controller, to make sure the whole actions in that controller all need JWT bearer authorization.
Runs And Tests
After we work hard to create that JWT web api project, let's run it.
- Login
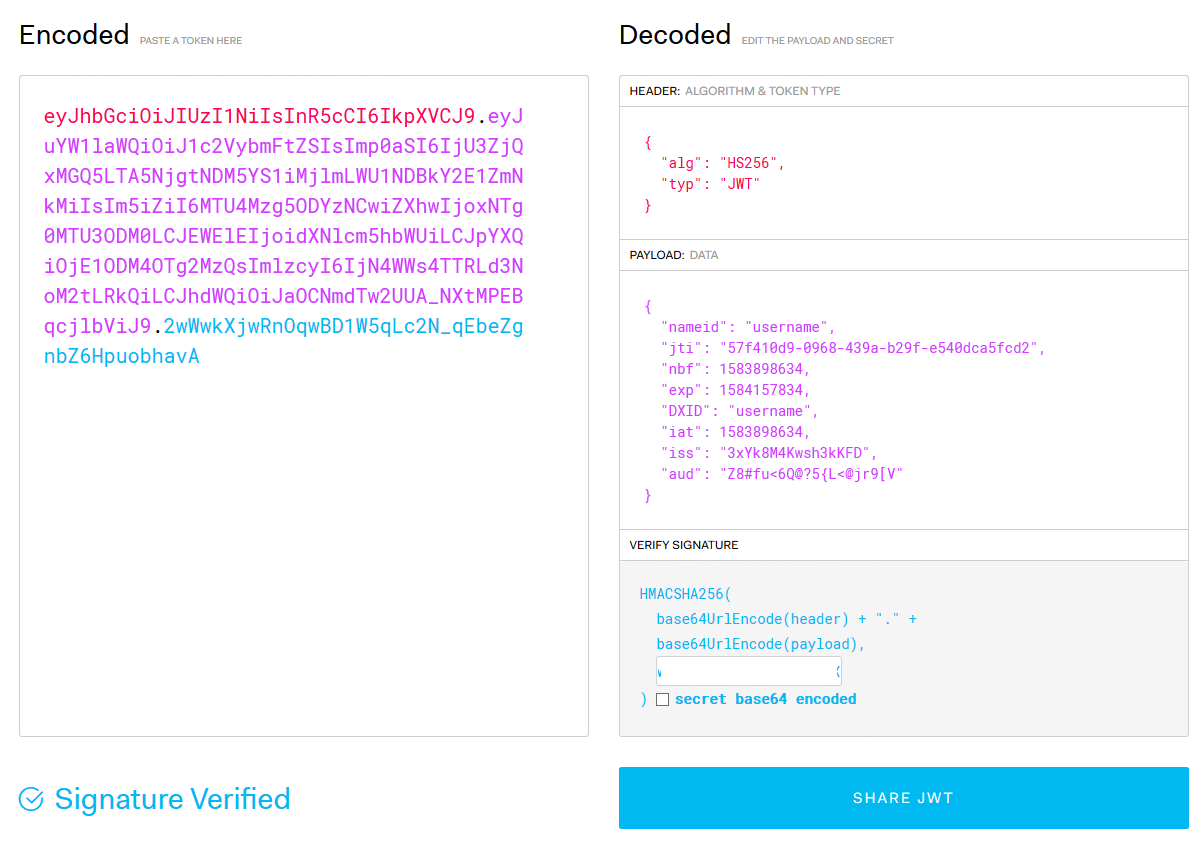
Try to login to grab JWT token inside http requst headers.
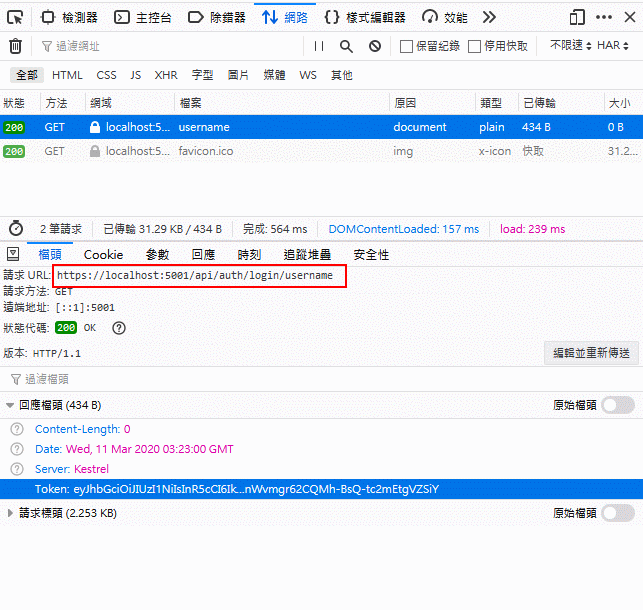
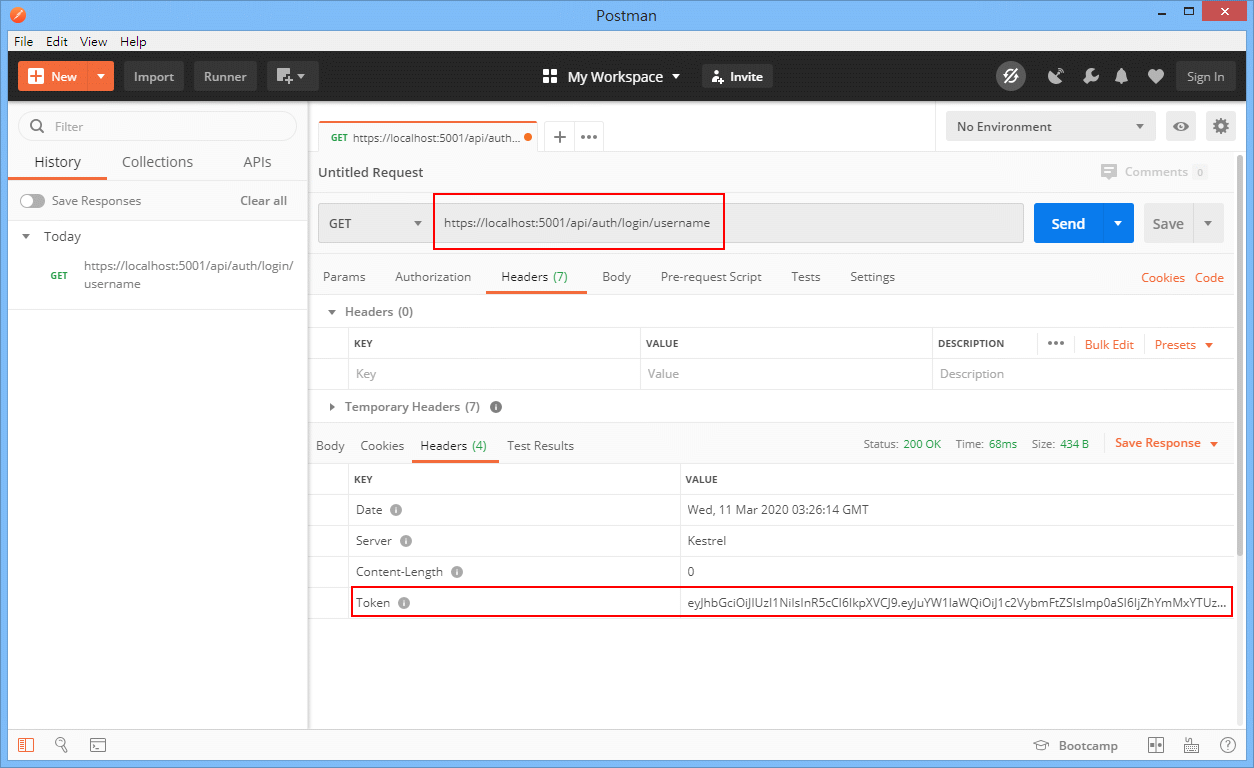
Yes, we can use jwt.io debugger to verify / observe our token is valid or not.
- Access data with JWT Token
We can access api by the token we grab earlier. Now, let us write some javascript to fetch data.
    fetch('https://localhost:5001/api/tests/jwt', {
        headers: new Headers({
            'Authorization': 'Bearer --a token we grab earlier--',
            'Content-Type': 'application/json; charset=utf-8'
        }),
        method: 'GET'
    }).then(res => res.json())
    .then(json => {
        console.log(json);
        document.getElementById('pre').innerHTML = JSON.stringify(json);
    });
If nothing goes wrong, we would get data we need from api with jwt token authorization.
-in browser 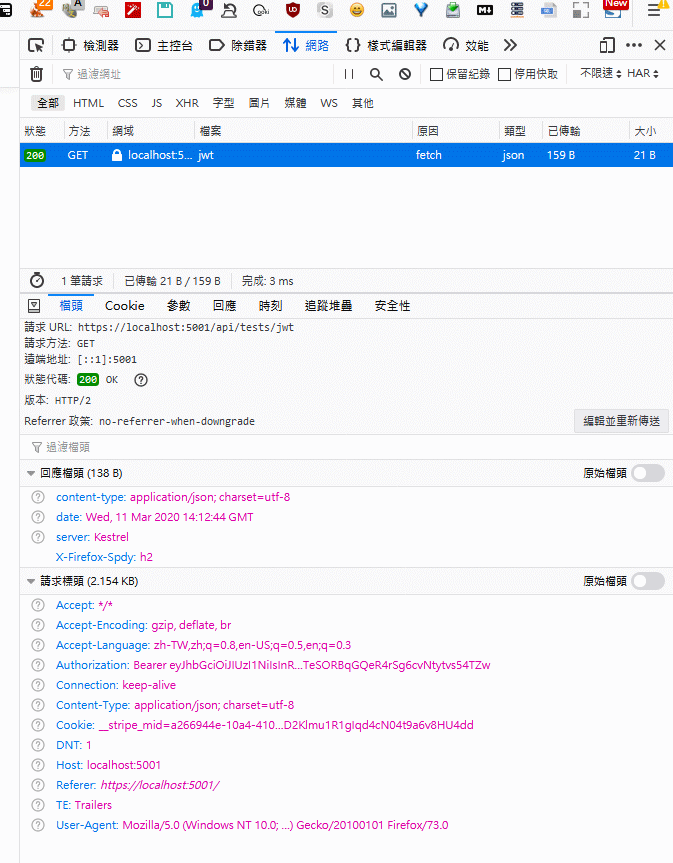
-by postman 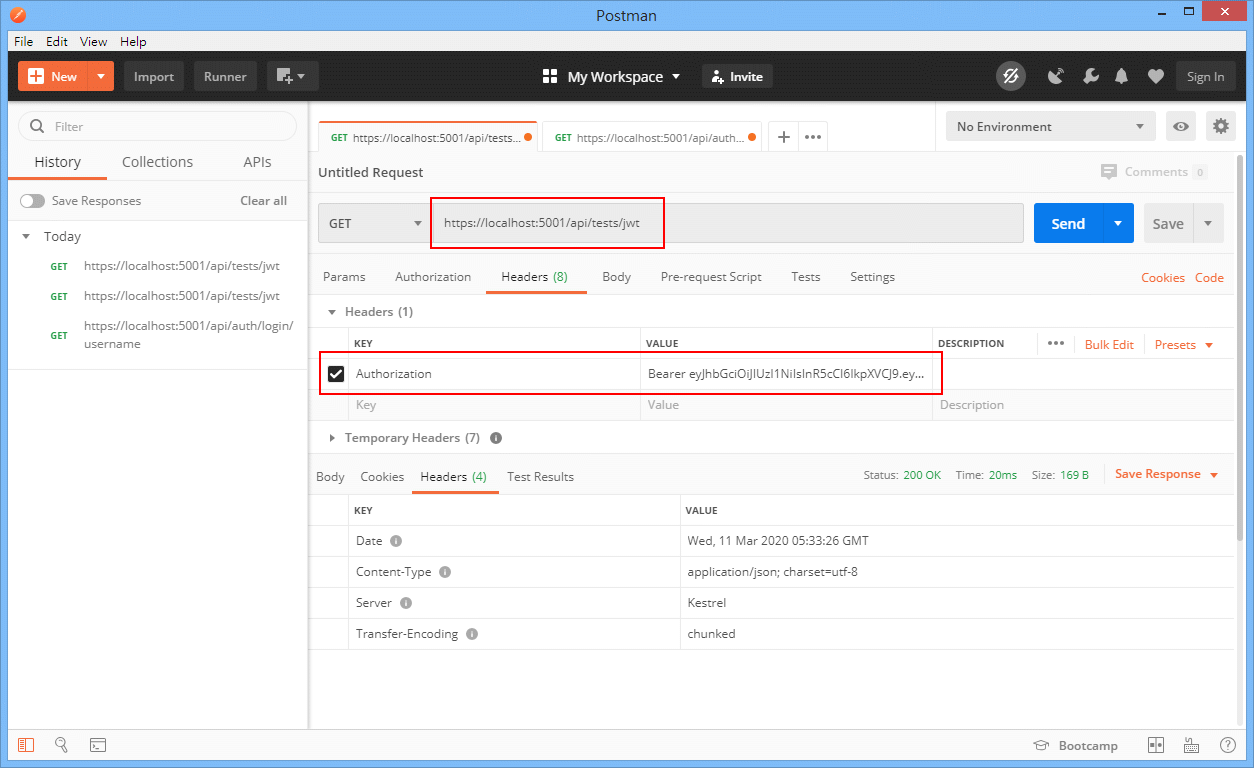
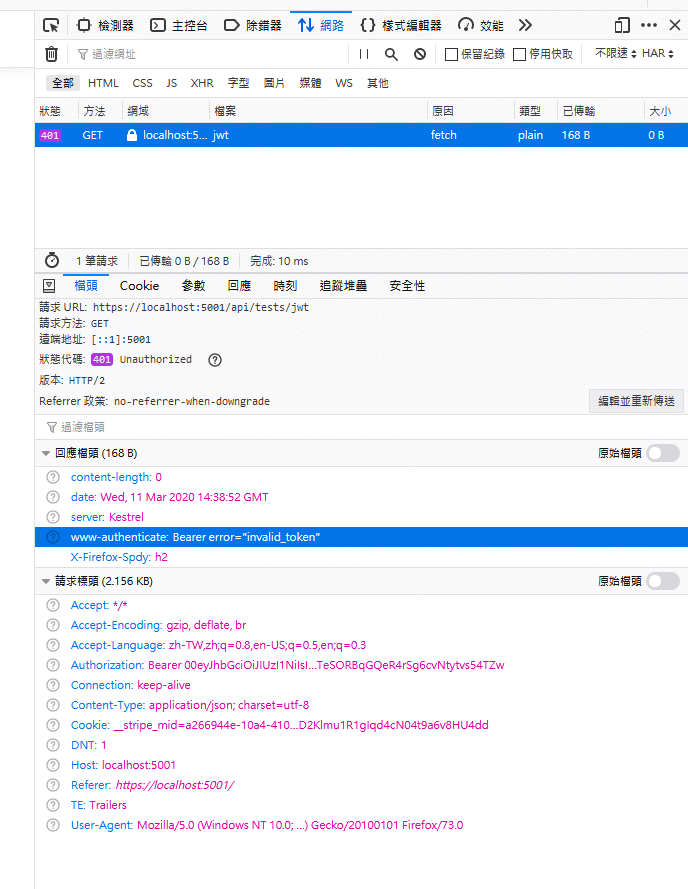
Otherwise, we might get an error with 401 Unauthorized status.
Conclusion
With the powerful .Net Core framework, it can provide us more secure, and easy way for people to access api.
Enjoy it.
References:
JWT – Peek into the Jargon “Java Web Token”
How To Use JWT Authentication With Web API
ASP.NET Core 3.1 - JWT Authentication Tutorial with Example API

