ASP.Net Core Integrate Payment Gateway
People browse, pick a product, add to cart, hit the checkout. It's second-nature. But what happens between customers entering their credit card numbers and getting paid? How do purchases get processed? Well, for that, you can credit payment gateways.
These gateways act as in-between services, processing inputted information provided during checkout and facilitating the authorization or fulfillment of payments made for e-businesses and online retailers. They’re used in brick-and-mortar establishments, too.
So, what is Payment Gateway exactly ? They are software and servers that transmit transaction information to acquiring banks and responses from issuing banks (such as whether a transaction is approved or declined). Essentially, payment gateways facilitate communication within banks.
How to Choose a Payment Gateway
When third-party tools get involved, we might need to evaluate the individual features of each and make a choice based on the needs and capabilities of our services. Here are some important things we should consider:
-
Security
No doubt, this sould be the most important thing we need to consider. It’s a no-brainer, but people are not going to just fork over sensitive financial information to an e-commerce store that looks shady. We want a payment gateway that’s reputable and provides safe checkout experiences for customers.
Please note: displaying security signage is powerful — more than 80 percent of consumers feel safer seeing logos of trustworthy payment options on a website.
Above all, only use a payment gateway that handles your customers’ delicate data with care. If you do, they’re more likely to stick around.
-
Benefit
Like with almost any service, there are fees associated using third-party tools like payment gateways. You’ll have to pay transaction fees for your business — so pay attention to your gateway’s costs and do your research before integrating it into your site so you’re not slammed with surprise fees.
These fees charged can include transaction, statement, chargeback, merchant account fees, and likely more — such as fees to customers for using a certain payment method. And not surprisingly, customers do NOT like hidden costs so read the fine print.
-
Accepted Payment Methods
The reality is, the easier you make it for customers to make purchases, the more they’re likely to make. By outfitting your site with a payment gateway that incorporates a wide variety of payment methods, your widening your sales net — 50 percent of regular online shoppers say they’d jump ship on a purchase if they couldn’t use their preferred payment method.
Using your site’s analytics, observe what countries have shoppers visiting your e-commerce website — preferred payment methods may differ by country.
Plus, it’s also a matter of security: 40 percent of study participants said they would feel more comfortable shopping from a business that offers multiple payment methods. Chew on that.
-
Compatibility
Of course, an important consideration is how well your gateway will integrate with your current platform — both from a technical and design standpoint. If it takes an over-abundance of messy tricks to incorporate smoothly into your existing structure, you might want to rethink your choice.
Nobody got time for that.
And while many gateways (like Stripe, for example) can be customized to match your site’s feel, you want to make sure your gateway tool is compatible with your brand. Don’t make your customers’ purchasing experiences jarring with mismatched elements.
-
Payment from Local or Redirect
Some payment gateways allow customers to complete a transaction within the checkout processes of the website, while others lead users to another site to finish their purchases. Some gateways provide an API that incorporates directly into your site, others reroute visitors to third-party sites. Whatever you choose, consider what will provide the best user experience for your shoppers — if customers trust your site, they might not mind the extra diversion.
-
For the record, these're all from The 10 Most Popular Online Payment Gateways for Your Website, Compared, not my idea, and I agree with them.
Selecting a Payment Gateway
There are many payment gateway services around the would. Here are some of them,
- Amazon Payments
- WePay
- PayPal Payments Pro
- Authorize.net
- 2Checkout
- Stripe
- Worldpay
- Merchant E-Solutions
- NewebPay
- TapPay
- O'Pay
Let's pick one. In my personal opinion, I randomly choose Stripe, and NewebPay for the further sessions.
Work with Payment Gateways
Before we start to integrate payment gateway, we should have some products as order in cart.
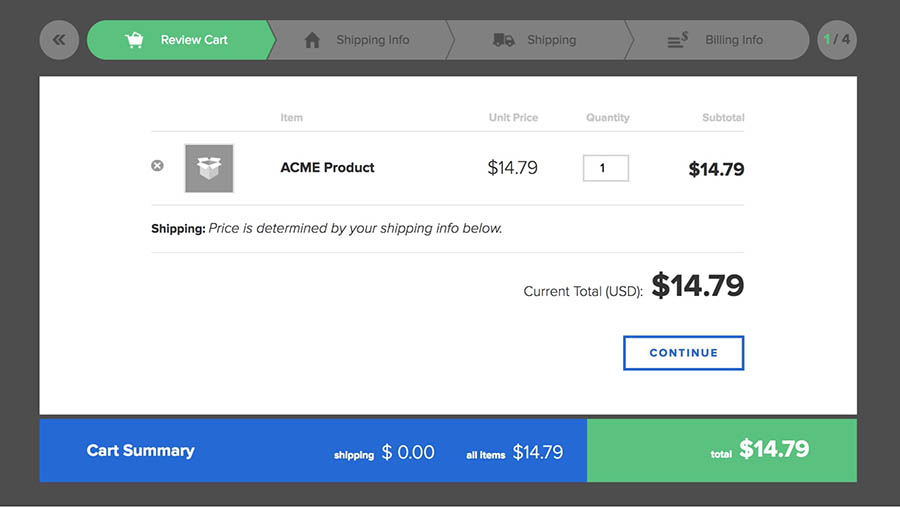
In Razor Pages OnGet handler, we do some handmade hard-code to generate a fake cart for demonstration.
    public void OnGet()
    {
        // for stripe
        this.PublishableKey = this.AppSettings?.Stripe.PublishableKey;

        // for newebPay
        var cart = GenerateCart();
        var orderNo = DateTime.Now.Ticks.ToString();
        var totamAmount = cart.Total + (cart.ShippingFee ?? 0);
        var itemDesc = cart.CartItems.Aggregate("", (ret, next) => ret + next.Product.Name + ",").TrimEnd(',');
        var timeStamp = Cores.Datetimes.GetUnixTimestamp();
        const string customerEmail = "bafefe2950@onmail.top";

        // for tests, treat products in cart like an order.
        // for real world usage, we should follow the rule to create order.
        var order = new OrderData
        {
            OrderNo = orderNo,
            TimeStamp = timeStamp,
            ItemDesc = itemDesc,
            Amt = totamAmount,
            CustomerEmail = customerEmail,
            Products = cart.CartItems.Select(p => p.Product).ToArray()
        };
        this.Order = order;
        this._cache.Set("order", order); // store order by using IMemoryCache

        ViewData["Title"] = "Shopping Cart demo";
        this.Cart = cart;
    }
After some hard work, we can see a demo of my cart shown below.
-Integrate with Stripe
Let's try to work with Stripe. Follow the document, we need to have SecretKey and PublishableKey to get things worked.
As we can see, we can grab these keys from the Stripe Console.
And then, we install Stripe.net package to help us to work with stripe If not, we will call stripe api directly from our own.
Follow the document, we create a Session to checkout products (order) inside the cart.
        StripeConfiguration.ApiKey = "Your_Secret_Key";

        var service = new SessionService();
        var session = await service.CreateAsync(new SessionCreateOptions
        {
            SuccessUrl = $"a_url_while_payment_success",
            CancelUrl = $"a_url_while_payment_went_wrong",
            PaymentMethodTypes = new List<string> {
                "card",
            },
            LineItems = new List<SessionLineItemOptions> {
                new SessionLineItemOptions {
                    Name = "product_name",
                    Description = "product_description",
                    Amount = cart_item_amount * 100, // why times 100 ? follow the stripe rule.
                    Currency = "TWD",
                    Quantity = cart_item_quantity,
                    Images = product_images.ToList() // please set it up with absolute url path
                },
                ...... // more products
            },
            CustomerEmail = "customer_email",
            Locale = "en"
        }).ConfigureAwait(false);
After session created, we pass session id to javascript, to redirect to payment page.
        var stripe = Stripe(Your_Publishable_Key);
        stripe.redirectToCheckout({
            essionId: sessionId
        }).then((resp) => {
            console.log(resp);
        });
If, nothing goes wrong, we will be redirected to stripe payment page shown below.
And it will return back to the page which we setup SuccessUrl in session service earlier, after payment processed. If we leave it (SuccessUrl) blank, it will stay in stripe payment page.
Plus, if we setup CancelUrl, we will see a cancel link. If not, that cancel link won't display on the page.
Above all, there're one of general use stripe payments flow. Pretty easy.
-Integrate with NewebPay
Now, let's dive into another payment gateway, NewebPay. Here is a interesting post written by a friend you should read. That could help you understand quickly how NewebPay work.
According to the document, NewebPay payment flow might be a little bit complex.
Also, we can grab needed parameters upon NewebPay Backend console. And there're many configure items can be set up, such as payment methods, delivery methods,... etc.
The process starts with a form post. Therefor, we need a form to send request to specified destination (newebPay url). We create a ViewComponent to help us to generate that form shown below.
        <div class="container" style="display: none;">
            <form action="destination_url" method="post">
                <input type="hidden" name="MerchantID" value="[MerchantId]" />
                <input type="hidden" name="RespondType" value="JSON" />
                <input type="hidden" name="TradeInfo" value="[TradeInfo]" />
                <input type="hidden" name="TradeSha" value="[TradeSha]" />
                <input type="hidden" name="Version" value="1.5" />
                <input type="hidden" name="LangType" value="zh-tw" />
            </form>
        </div>
The most important data that rounds with square brackets, such as MerchantID, TradeInfo, TradeSha. Especially TradeInfo and TradeSha, they need to do some calculating followed the rule offered by NewebPay document.
        // follow the document, the sequence of parameters doesn't matter, but need to cover all needed elements
        var pre_aes = $"MerchantID={neweb?.MerchantID}" +
            $"&TimeStamp={order.TimeStamp}" +
            "&Version=1.5" +
            $"&MerchantOrderNo={order?.OrderNo}" +
            $"&ItemDesc={order?.ItemDesc}" +
            $"&Amt={order?.Amt}" +
            $"&Email={order?.CustomerEmail}" +
            "&EmailModify=0" +
            "&LoginType=0" +
            $"&ReturnURL={returnUrl}" +
            "&RespondType=JSON";

        var tradeInfo = Crypto.EncryptAES256(neweb.Key, neweb.HashIV, pre_aes);

        // follow the document
        var pre_sha = $"HashKey={neweb?.Key}&{tradeInfo}&HashIV={neweb.HashIV}";
        var tradeSha = Crypto.SHA256(pre_sha);
TradeInfo contains lots of elements (such as MerchantID, TimeStamp, MerchantOrderNo...) in it. And it encrypted by AES256, we need a Key, and HashIV to encrypt. The algorithm can check the document offered by NewebPay.
After things set up, the ViewComponent will generate the request form. It will redirect to NewebPay payment page when form action fired.
Please notice, if requested incorrect data, an error page contains error message(s) will represent.
While the payment processed without any errors, it will return back to the url, ReturnURL, set up earilier.
What if, the ReturnURL set up with blank (or just pass the parameter), nothing won't happen, the flow will not return back to our site.
After payment flow worked, that ReturnURL redirected, we should check our order via that ReturnURL router, such as payment data sent back from NewebPay. With the example, the ReturnURL is a api, it's a right point to check the order.
    [HttpPost("complete/{orderNo}")]
    [ServiceFilter(typeof(NewebValidateFilter))] // an action filter to validate some data first
    public IActionResult Complete(string orderNo)
    {
        if (string.IsNullOrEmpty(orderNo))
        {
            return BadRequest("missing orderNo");
        }

        // get stored order data, in realworld, it usually stored in database,
        // in this example, we used IMemoryCache for explaining things easily.
        if (!(this._cache.Get("order") is OrderData order))
        {
            return BadRequest("order not found");
        }
        ......

        // get appSettings via IOptions<AppSettings>
        var neweb = this.AppSettings?.Neweb;

        // check everything as possible as you can !!
        var tradeInfo = Request.Form["TradeInfo"];
        var deAesInfo = Crypto.DecryptAES256(neweb.Key, neweb.HashIV, tradeInfo);
        var returnedInfo = JsonSerializer.Deserialize<Results>(deAesInfo); // containts payment data sent back by NewebPay

        DateTime.TryParse(returnedInfo.Result.PayTime, out var dt);
        returnedInfo.Result.PayTimeR = dt;

        if (returnedInfo.Result.MerchantID != neweb?.MerchantID)
        {
            return BadRequest("bad merchant id");
        }
        ......

        return RedirectToPage("/Cart/Complete", new { orderNo });
    }
The sample codes stand on GitHub. And yes, these are the easy way to use payment gateway.
Enjoy It.
References:
The 10 Most Popular Online Payment Gateways for Your Website, Compared
.NET 開發人員智付通 API 串接心路歷程與 Open Source
If you are looking latest solutions for payement gateway integration in ASP.NET web forms look at demos:
- Stripe in ASP.NET demo: https://techtolia.com/Stripe/
- PayPal in ASP.NET demo: https://techtolia.com/PayPal/