在Xamarin.Forms 執行時載入 XAML
1. 前言
一般APP 畫面和版面在程式發布後就已經定型,但有些情況(客戶)希望由後端控制畫面,以省去重複發布APP的作業流程。
這篇文章提供3個範例,由WebAPI 回傳 XAML字串,讓 Xamarin.Forms執行時載入並呈現在畫面上。
2.實作範例
2.1 加入一個按鈕到畫面
• 在 API 端 回傳一個 XAML格式的按鈕
{
        [Route("~/api/GetSample1")]
        [HttpGet]
        public Response<List<string>> GetSample1()
        {
            List<string> list = new List<string>();
            string button = "<Button Text=\"A L E R T\" FontSize=\"20\" FontAttributes=\"Bold\" BackgroundColor=\"LightSkyBlue\" TextColor=\"White\"/>";

            list.Add(button);
            var resp = new Response<List<string>>(list, new Response() { Status = "Success", ReturnCode = "200", ResponseTo = "User", Message = "Success" });

            return resp;
        }
• APP端在PAGE載入時將回傳的XAML字串轉成Xamarin.Forms.Button 物件。並加入按鈕點擊事件。
 public Sample1Page()
        {
            InitializeComponent();
            LoadXaml();
        }


        async Task LoadXaml()
        {
            this.Loading(true);

            // API REUTRN XAML BUTTON
            // ADD BUTTON CLICK ALERT EVENT
            // ADD BUTTON TO LAYOUT
            var navigationButtonXAML = await ApiService.GetXamlItems("GetSample1");

            Button navigationButton = new Button().LoadFromXaml(navigationButtonXAML.FirstOrDefault());
            navigationButton.Clicked += OnNavigationButton_Clicked;

            _stackLayout.Children.Add(navigationButton);

            this.Loading(false);
        }

        async void OnNavigationButton_Clicked(object sender, EventArgs e)
        {
            await DisplayAlert("Alert", "Alert Display", "OK");
        }
•一個簡單的物件就成功加入畫面了。

2.2 加入一個完整頁面
•在 API 端回傳一個 XAML頁面,頁面中有兩個Entry 物件,一個Picker,和一個Button。
   [Route("~/api/GetSample2Page")]
        [HttpGet]
        public Response<List<string>> GetSample2Page()
        {
            List<string> list = new List<string>();

            string page = "<?xml version=\"1.0\" encoding=\"utf-8\"?><ContentPage xmlns=\"http://xamarin.com/schemas/2014/forms\"\nxmlns:x=\"http://schemas.microsoft.com/winfx/2009/xaml\"\nx:Class=\"RuntimeXaml.Sample2Page\"\nTitle=\"Post Items\">\n<StackLayout x:Name=\"_postLayout\">\n<Entry Placeholder=\"WHO\"/>\n<Picker><Picker.Items><x:String>WILL DO</x:String><x:String>WILL ARRIVE</x:String><x:String>WILL MEET</x:String></Picker.Items></Picker>\n<Entry Placeholder=\"Object\"/>\n<Button Text=\"POST\" x:Name=\"_postButton\" />\n</StackLayout>\n</ContentPage>";


            list.Add(page);

            var resp = new Response<List<string>>(list, new Response() { Status = "Success", ReturnCode = "200", ResponseTo = "User", Message = "Success" });

            return resp;
        }
APP 端 接續範例1, 在點擊按鈕後載入API 回傳的XAML字串
var pageXAML = await ApiService.GetXamlItems("GetSample2Page");

ContentPage page = new ContentPage().LoadFromXaml(pageXAML.FirstOrDefault());

await Navigation.PushAsync(page);•確定畫面正確載入回傳的物件。
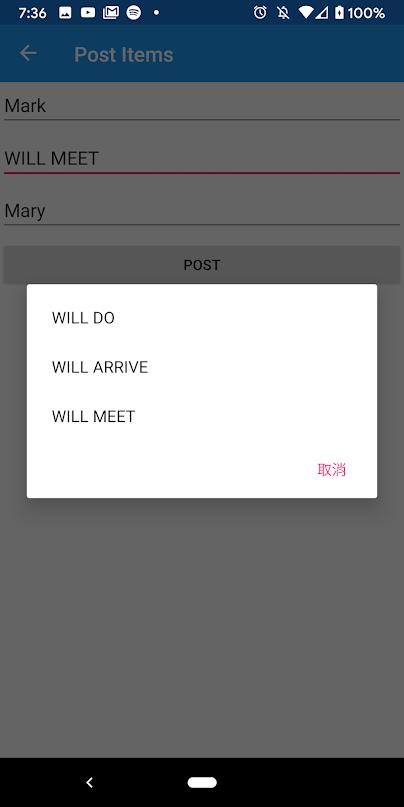
• 接著加入 點擊按鈕的事件,讓輸入框的內容Post到Web API。
點下按鈕後在StackLayout找尋Entry,Picker,DatePicker等用來輸入或選擇資料的物件,
並將輸入的值加入到 API Request中。
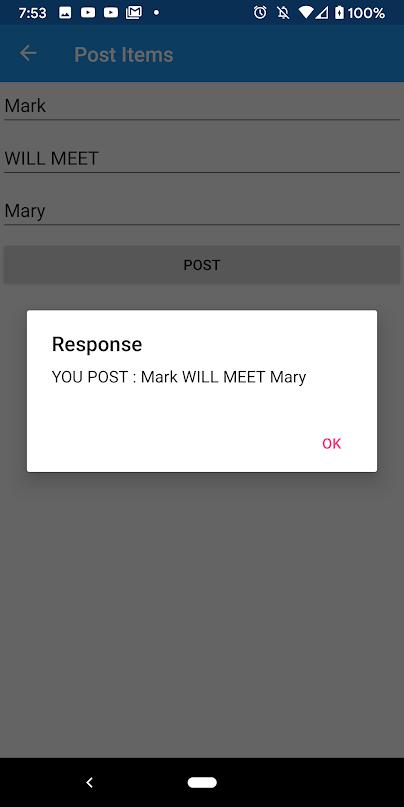
最後將POST API 的內容在彈出視窗呈現。
[APP畫面]
[APP端程式碼]
 // LOAD PAGE FROM API
            var pageXAML = await ApiService.GetXamlItems("GetSample2Page");

            ContentPage page = new ContentPage().LoadFromXaml(pageXAML.FirstOrDefault());

            // ADD BUTTON CLICK EVENT
            Button postButton = page.FindByName<Button>("_postButton");
            postButton.Clicked += async (sender2, args) =>
            {
                // SEARCH INPUTVIEW IN PAGE
                StackLayout postLayout = page.FindByName<StackLayout>("_postLayout");

                List<string> values = new List<string>();

                foreach (var element in postLayout.Children)
                {
                    switch (element)
                    {
                        case Entry entry:
                            var text = ((Entry)element).Text;
                            if (!string.IsNullOrWhiteSpace(text))
                            {
                                values.Add(text);
                            }
                            break;

                        case Picker picker:
                            var item = ((Picker)element).SelectedItem;
                            if (item == null) continue;
                            if (!string.IsNullOrWhiteSpace(item.ToString()))
                            {
                                values.Add(item.ToString());
                            }
                            break;

                        case DatePicker datePicker:
                            var date = ((DatePicker)element).Date;
                            values.Add(date.ToString("yyyy/MM/dd"));
                            break;
                    }
                }
                // POST DATA
                var postData = new PostData();
                postData.PostStrings = values;
                var apiResponse = await ApiService.PostItems(postData);

                // SHOW RESPONSE
                await DisplayAlert("Response", apiResponse.FirstOrDefault(), "OK");
            };


            await Navigation.PushAsync(page);
[API端程式碼]
 [Route("~/api/PostSample2")]
        [HttpPost]
        public Response<List<string>> PostSample2(PostData post)
        {
            List<string> list = new List<string>();

            string reslt = $"YOU POST : { string.Join(" ", post.PostStrings)}";

            list.Add(reslt);

            var resp = new Response<List<string>>(list, new Response() { Status = "Success", ReturnCode = "200", ResponseTo = "User", Message = "Success" });

            return resp;
        }
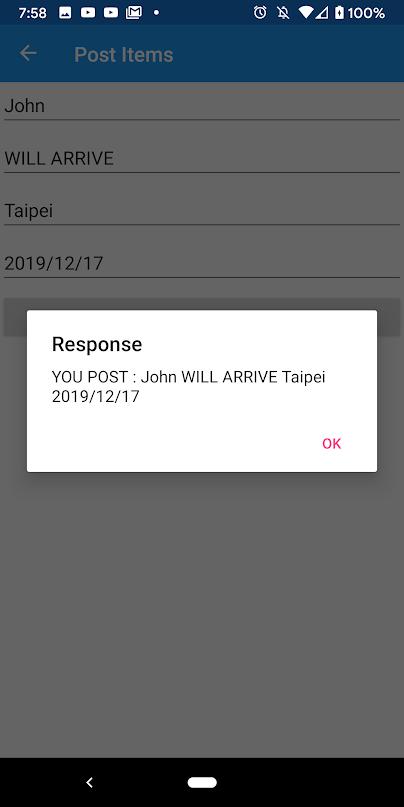
• 完成POST後可嘗試在API端增加回傳物件,
這邊以畫面多一個<DatePicker></DatePicker> 為例;
在不更新APP的情況增加畫面上的物件和增加回傳的資料。
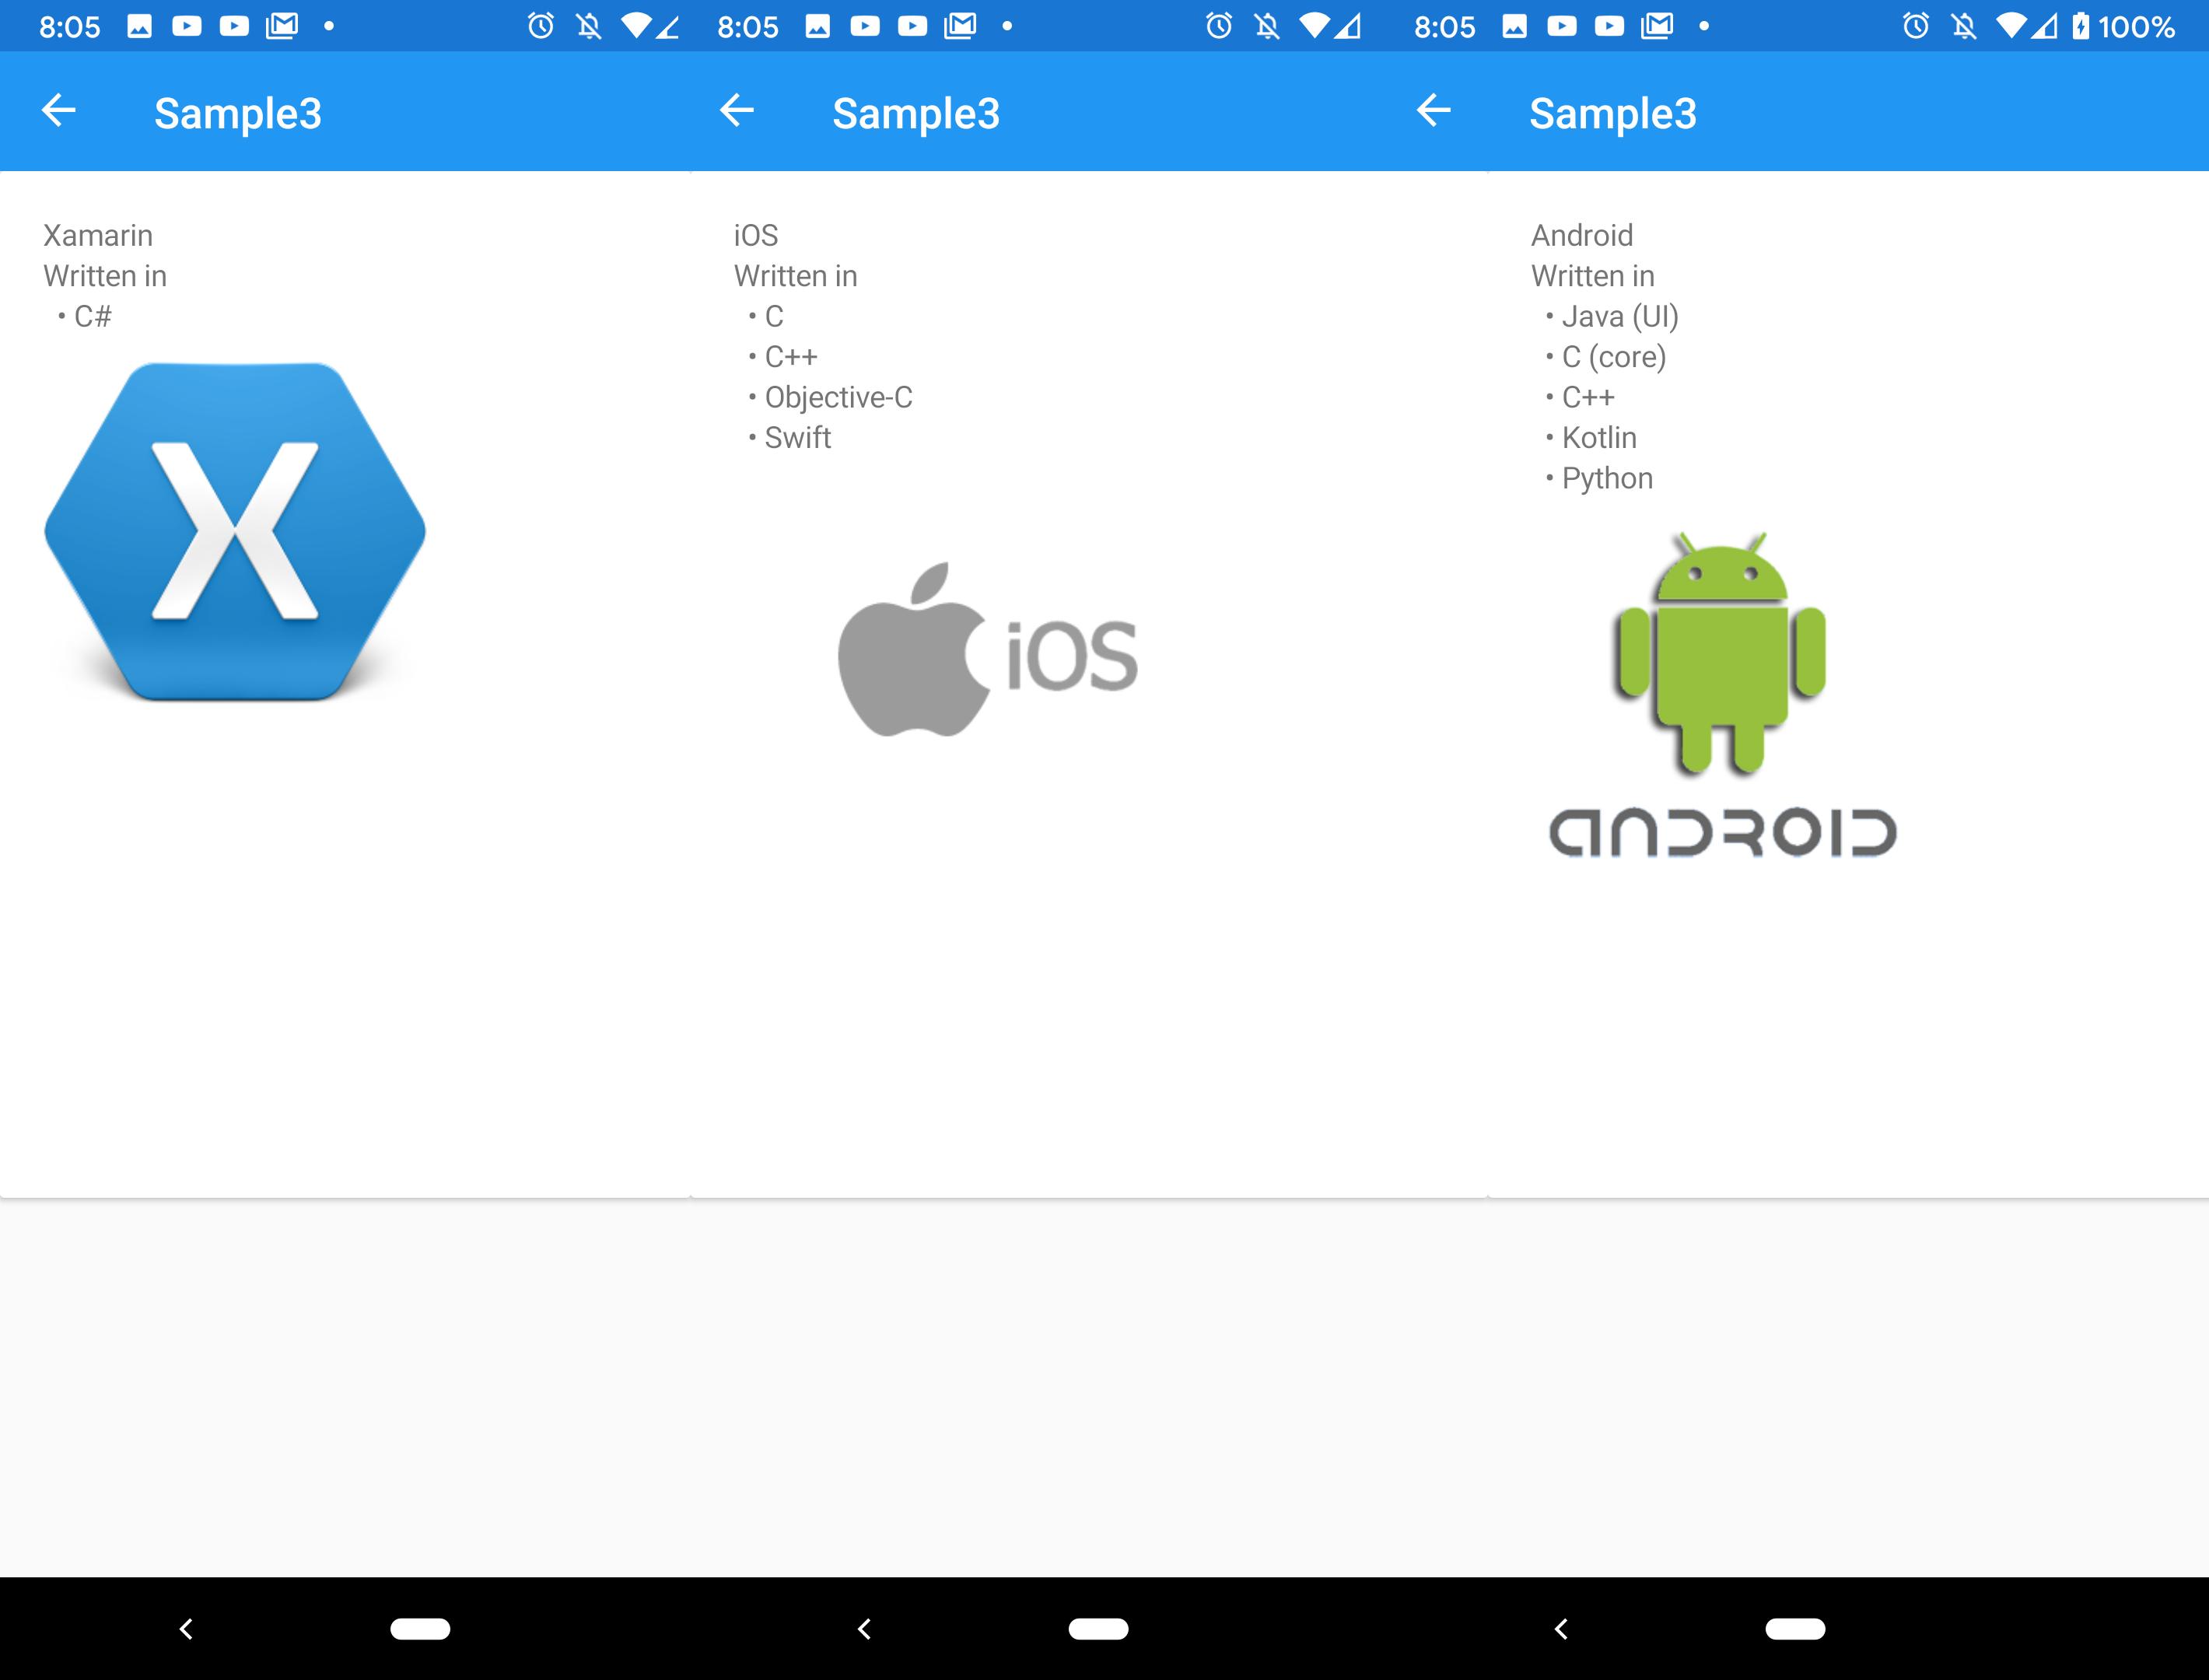
2.3 範例3, 回傳FlexLayout(可橫向滑動頁面)
[Route("~/api/GetSample3Page")]
[HttpGet]
public Response<List<string>> GetSample3Page()
{
List<string> list = new List<string>();
string page = "<ContentPage xmlns=\"http://xamarin.com/schemas/2014/forms\" xmlns:x=\"http://schemas.microsoft.com/winfx/2009/xaml\" xmlns:d=\"http://xamarin.com/schemas/2014/forms/design\" xmlns:mc=\"http://schemas.openxmlformats.org/markup-compatibility/2006\" mc:Ignorable=\"d\" x:Class=\"RuntimeXaml.Sample3Page\" xmlns:local=\"clr-namespace:RuntimeXaml\" Title=\"Sample3\" >\n <ScrollView Orientation=\"Both\">\n <FlexLayout>\n <Frame WidthRequest=\"300\" HeightRequest=\"480\"> \n<FlexLayout Direction=\"Column\">\n <Label Text=\"Xamarin\" />\n <Label Text=\"Written in\" />\n <Label Text=\" • C#\" /> \n<Image Source=\"https://runtimexaml.azurewebsites.net/images/xamarin.png\" WidthRequest=\"180\" HeightRequest=\"180\" /> \n <Label FlexLayout.Grow=\"1\" />\n </FlexLayout>\n</Frame>\n <Frame WidthRequest=\"300\" HeightRequest=\"480\">\n <FlexLayout Direction=\"Column\">\n <Label Text=\"iOS\" />\n <Label Text=\"Written in\" />\n <Label Text=\" • C\" />\n <Label Text=\" • C++\" />\n <Label Text=\" • Objective-C\" />\n <Label Text=\" • Swift\" />\n <Image Source=\"https://runtimexaml.azurewebsites.net/images/iOS.png\" WidthRequest=\"240\" HeightRequest=\"180\" />\n <Label FlexLayout.Grow=\"1\" />\n </FlexLayout>\n </Frame>\n <Frame WidthRequest=\"300\" HeightRequest=\"480\">\n<FlexLayout Direction=\"Column\"> \n <Label Text=\"Android\" /> \n <Label Text=\"Written in\" /> \n <Label Text=\" • Java (UI)\" />\n <Label Text=\" • C (core)\" /> \n <Label Text=\" • C++\" /> \n <Label Text=\" • Kotlin\" /> \n <Label Text=\" • Python\" /> \n <Image Source=\"https://runtimexaml.azurewebsites.net/images/android.png\" WidthRequest=\"180\" HeightRequest=\"180\" /> \n <Label FlexLayout.Grow=\"1\" /> \n </FlexLayout> \n </Frame> \n </FlexLayout> \n </ScrollView> \n </ContentPage>";
list.Add(page);
var resp = new Response<List<string>>(list, new Response() { Status = "Success", ReturnCode = "200", ResponseTo = "User", Message = "Success" });
return resp;
}
3. 選擇此解決方案要另外考慮裝置要保持網路連線,畫面載入速度較慢和要另外開發維護介面等問題。
參考資料
https://docs.microsoft.com/zh-tw/xamarin/xamarin-forms/xaml/runtime-load
SourceCode
https://github.com/WxyCliff/LoadingXAMLatRuntime